


Tips for achieving the colours you want when printing on fabric
Publicado el 27 February, 2020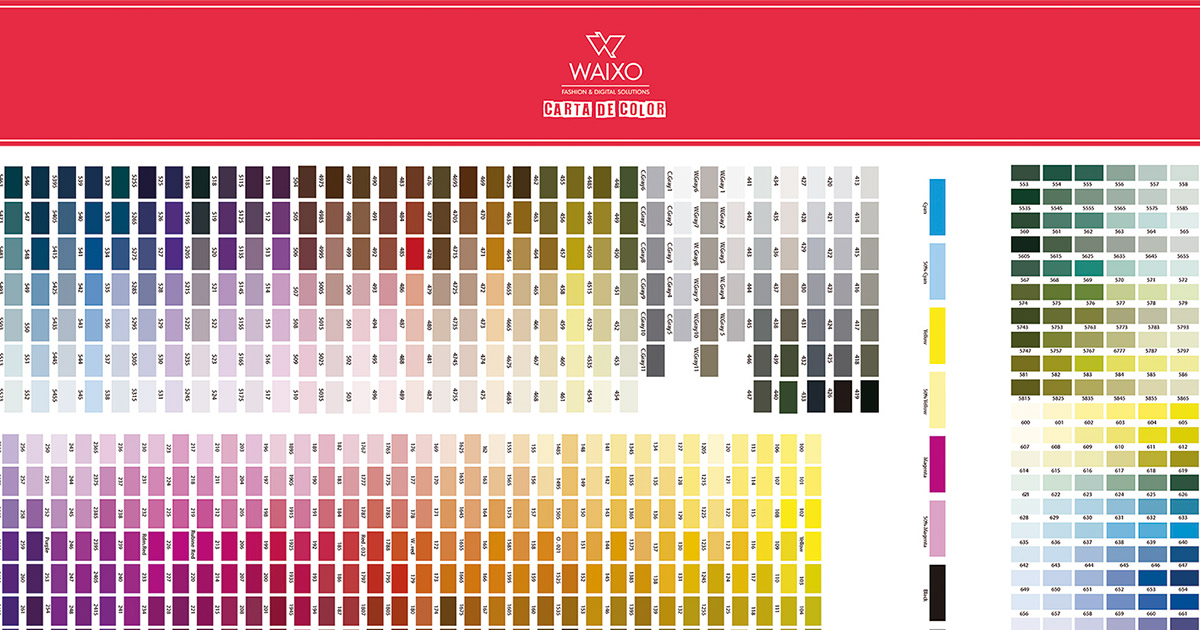
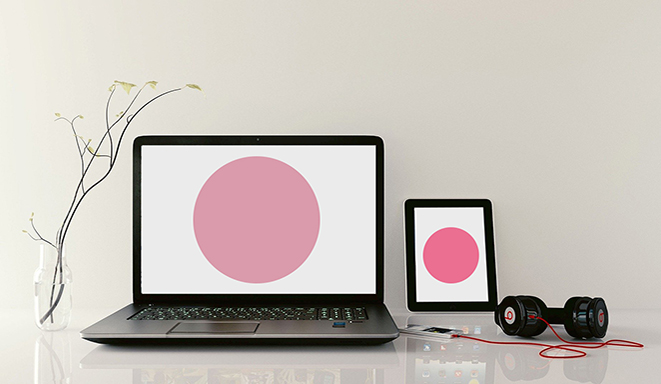
Do you want a fabric in a specific color or to create a print without fear of the result? Then Waixo is your place!
Have you ever wanted to print a design and found that the colors were different? That's because of the color profile. Each device uses a different type of profile, so if you look at the same design on different screens, the colors will likely vary slightly. That's why we must ensure that each file is created and saved with a color profile compatible with the device where the design will be printed.
Therefore, the best way to ensure optimal color results is to get our Color Chart, which includes approximately 2,000 colors. For 20 € + VAT (shipping costs 5.95 €) you will have a very useful working tool and avoid undesirable surprises.
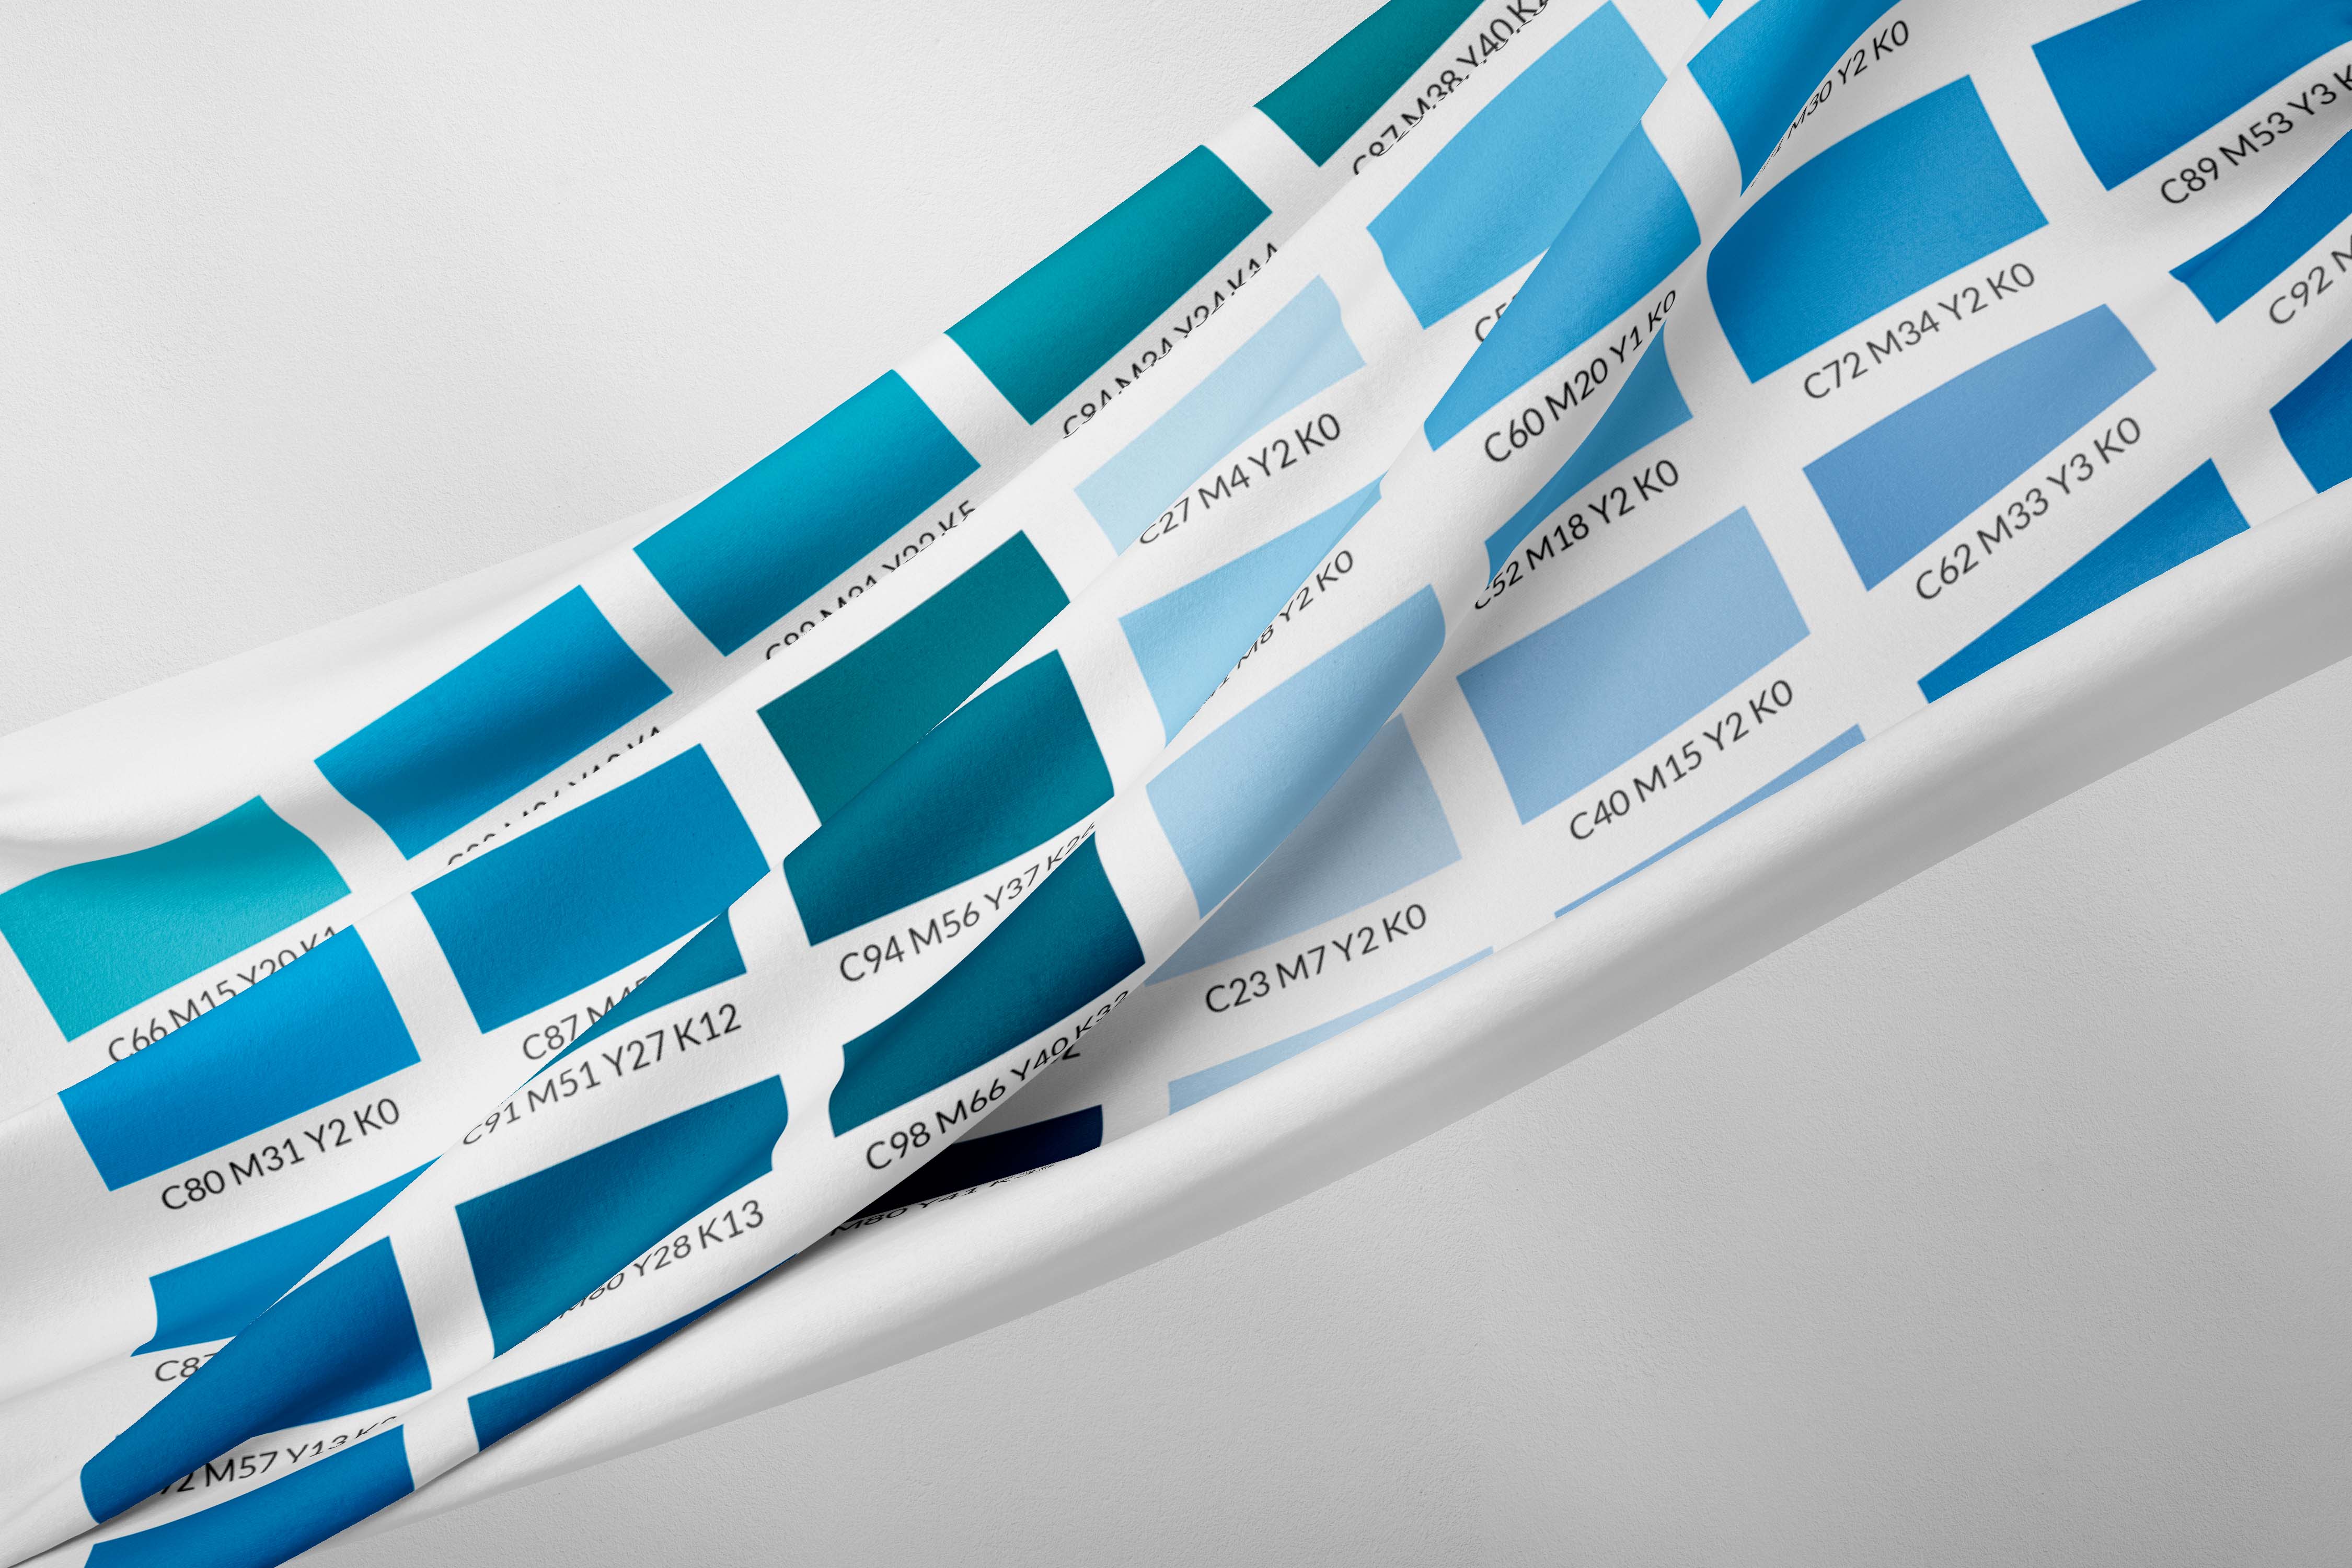
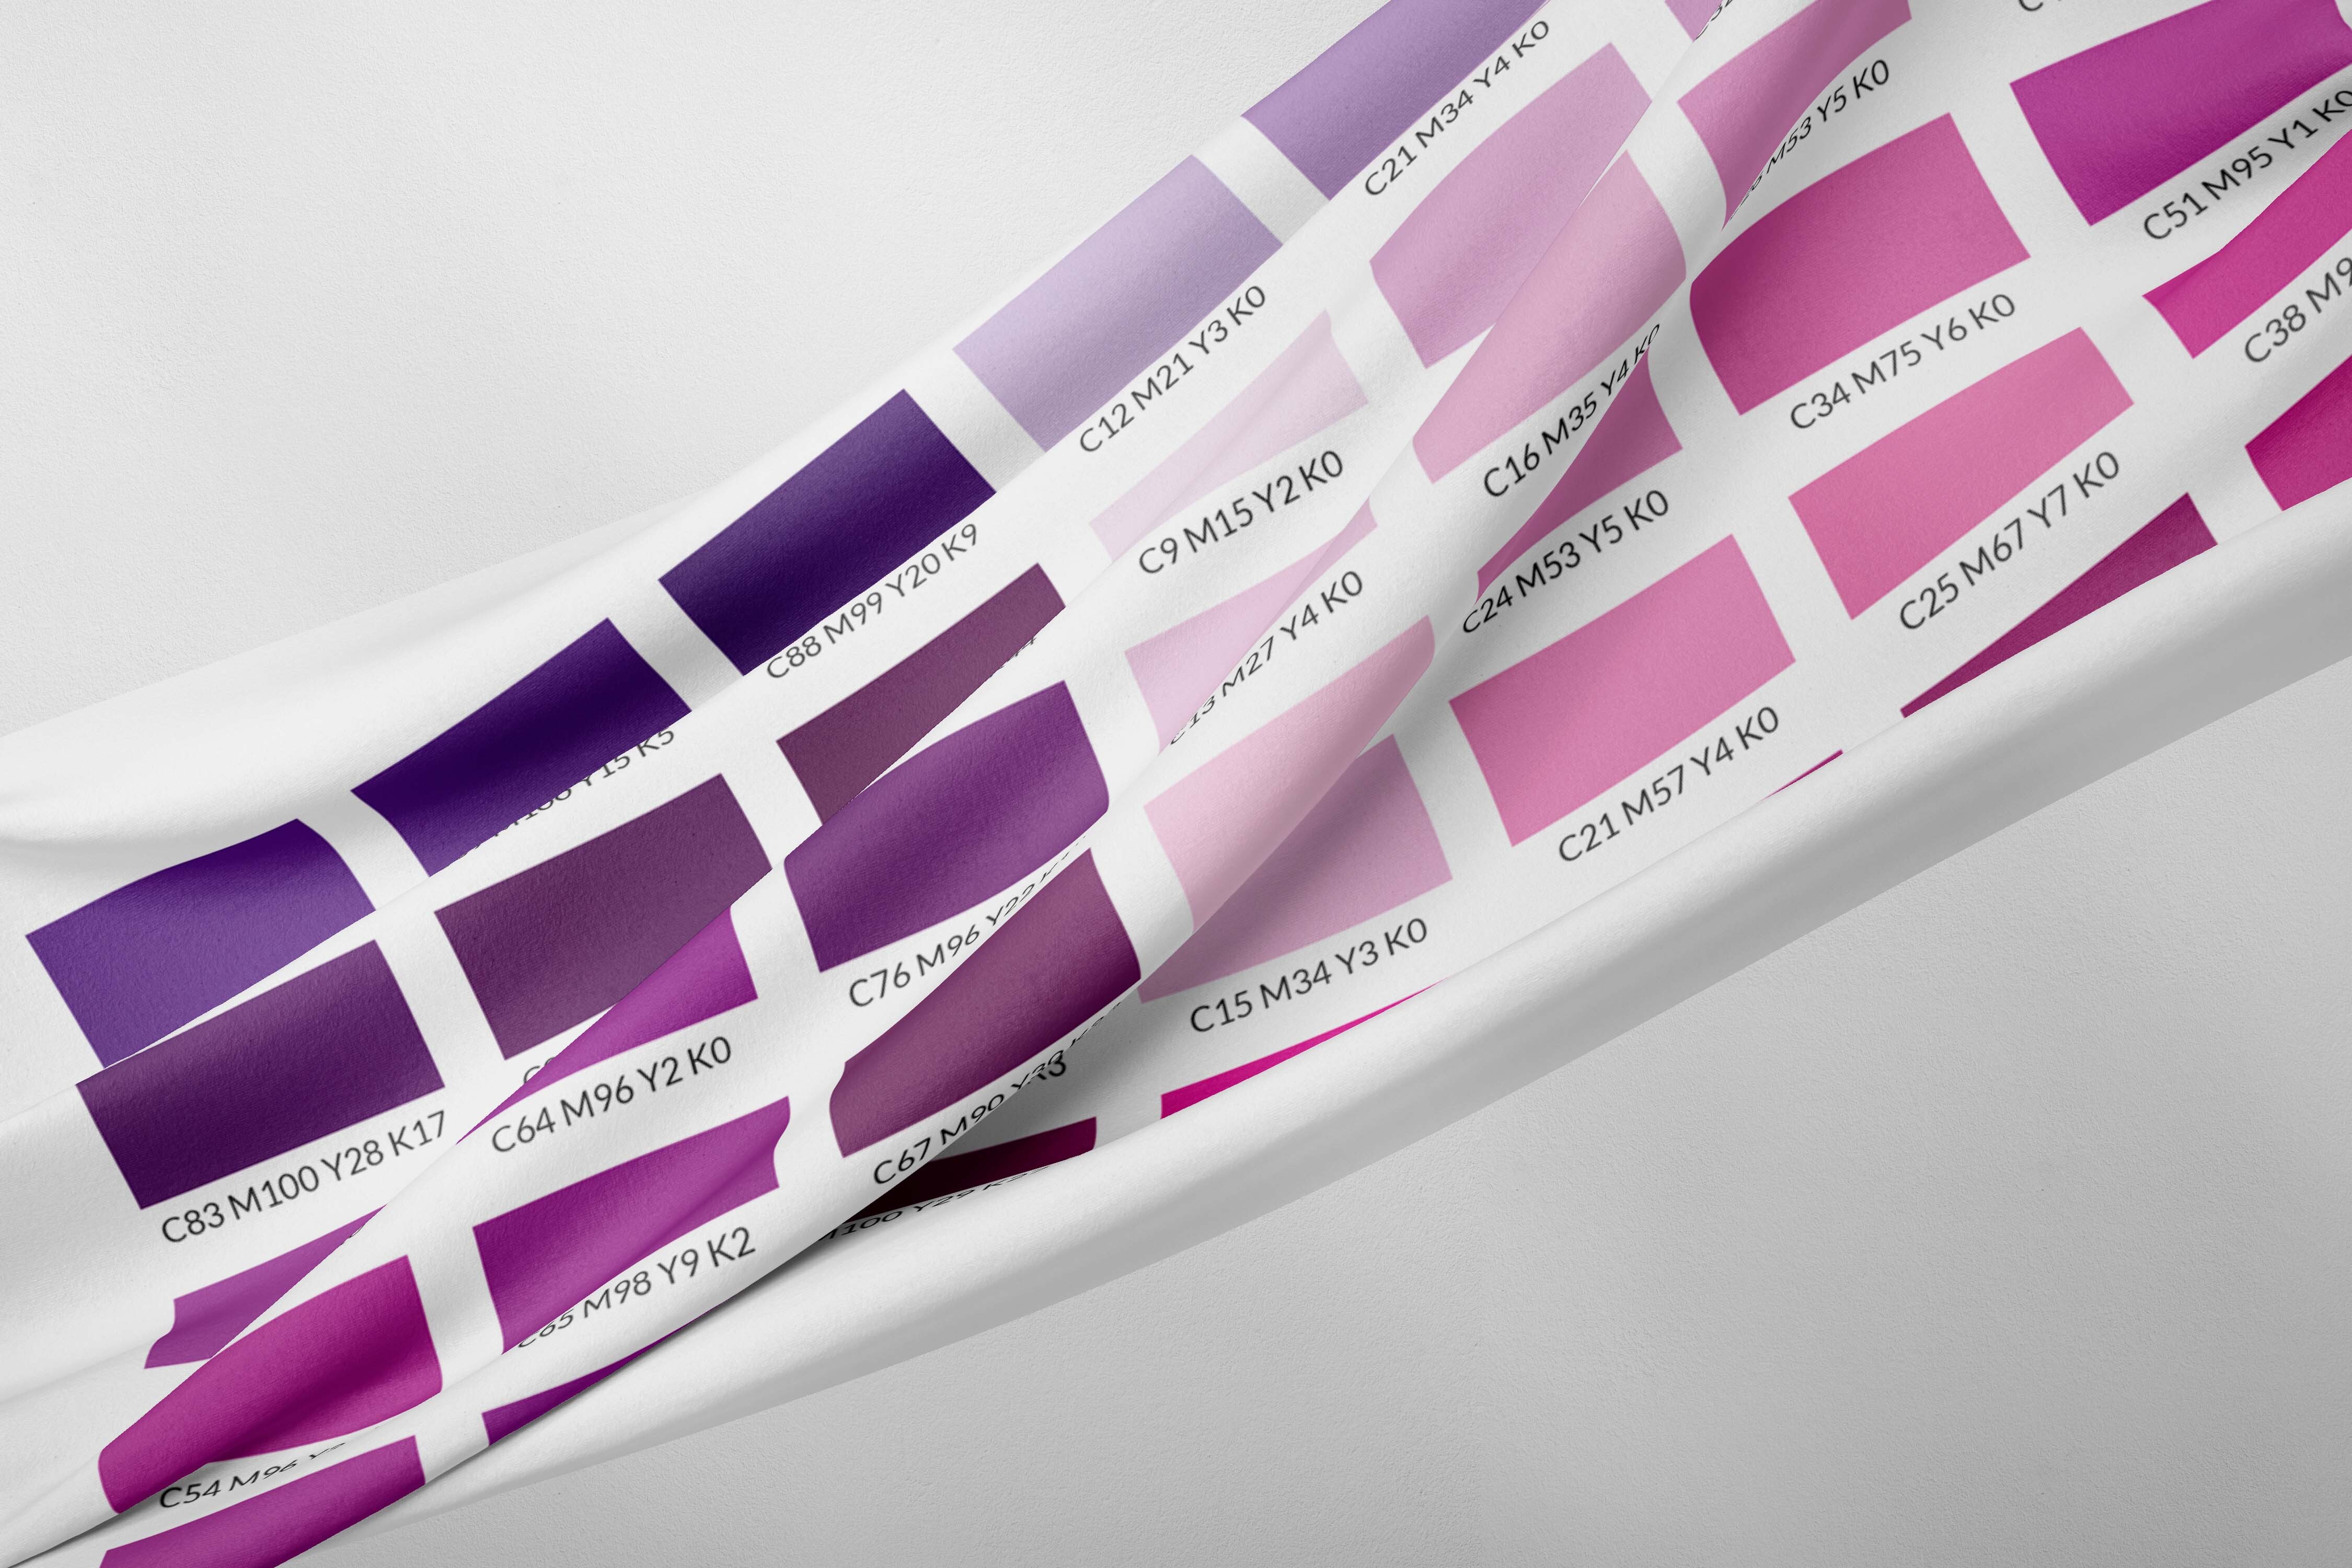
If you work with very specific color ranges, you also have the option of selecting smaller color charts, for 1.99 € + VAT you will have more than 200 colors of each type of color:
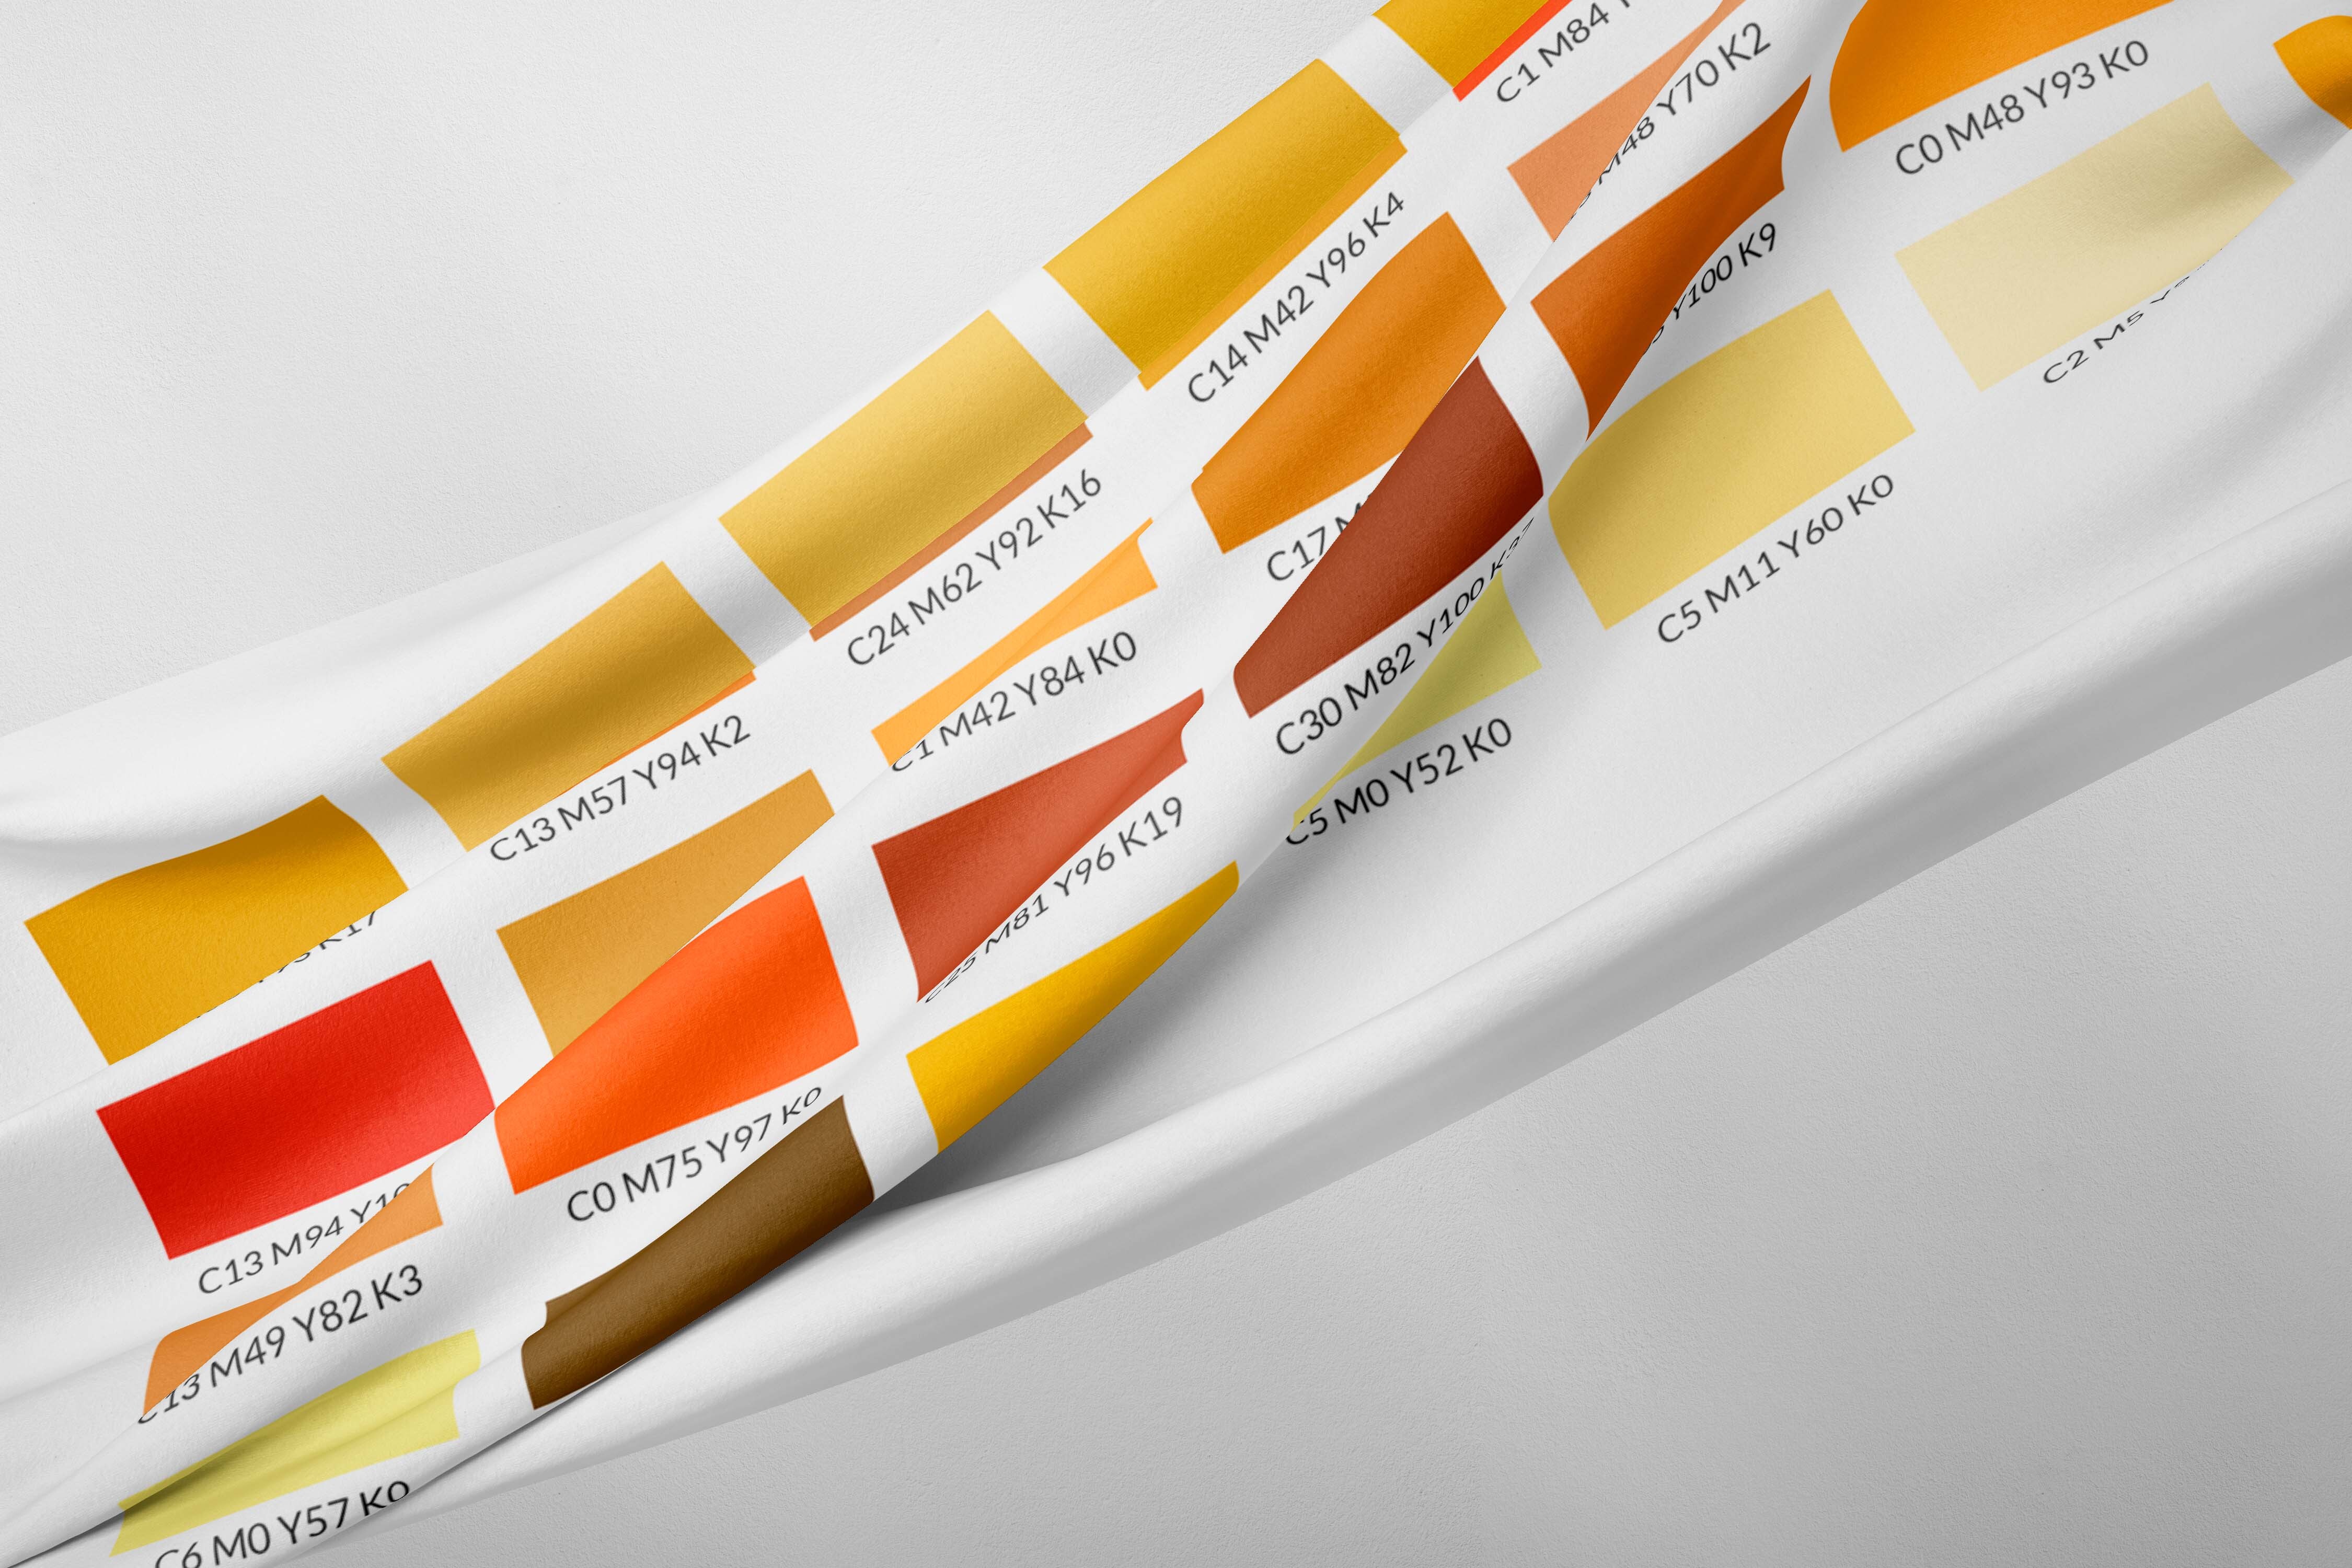
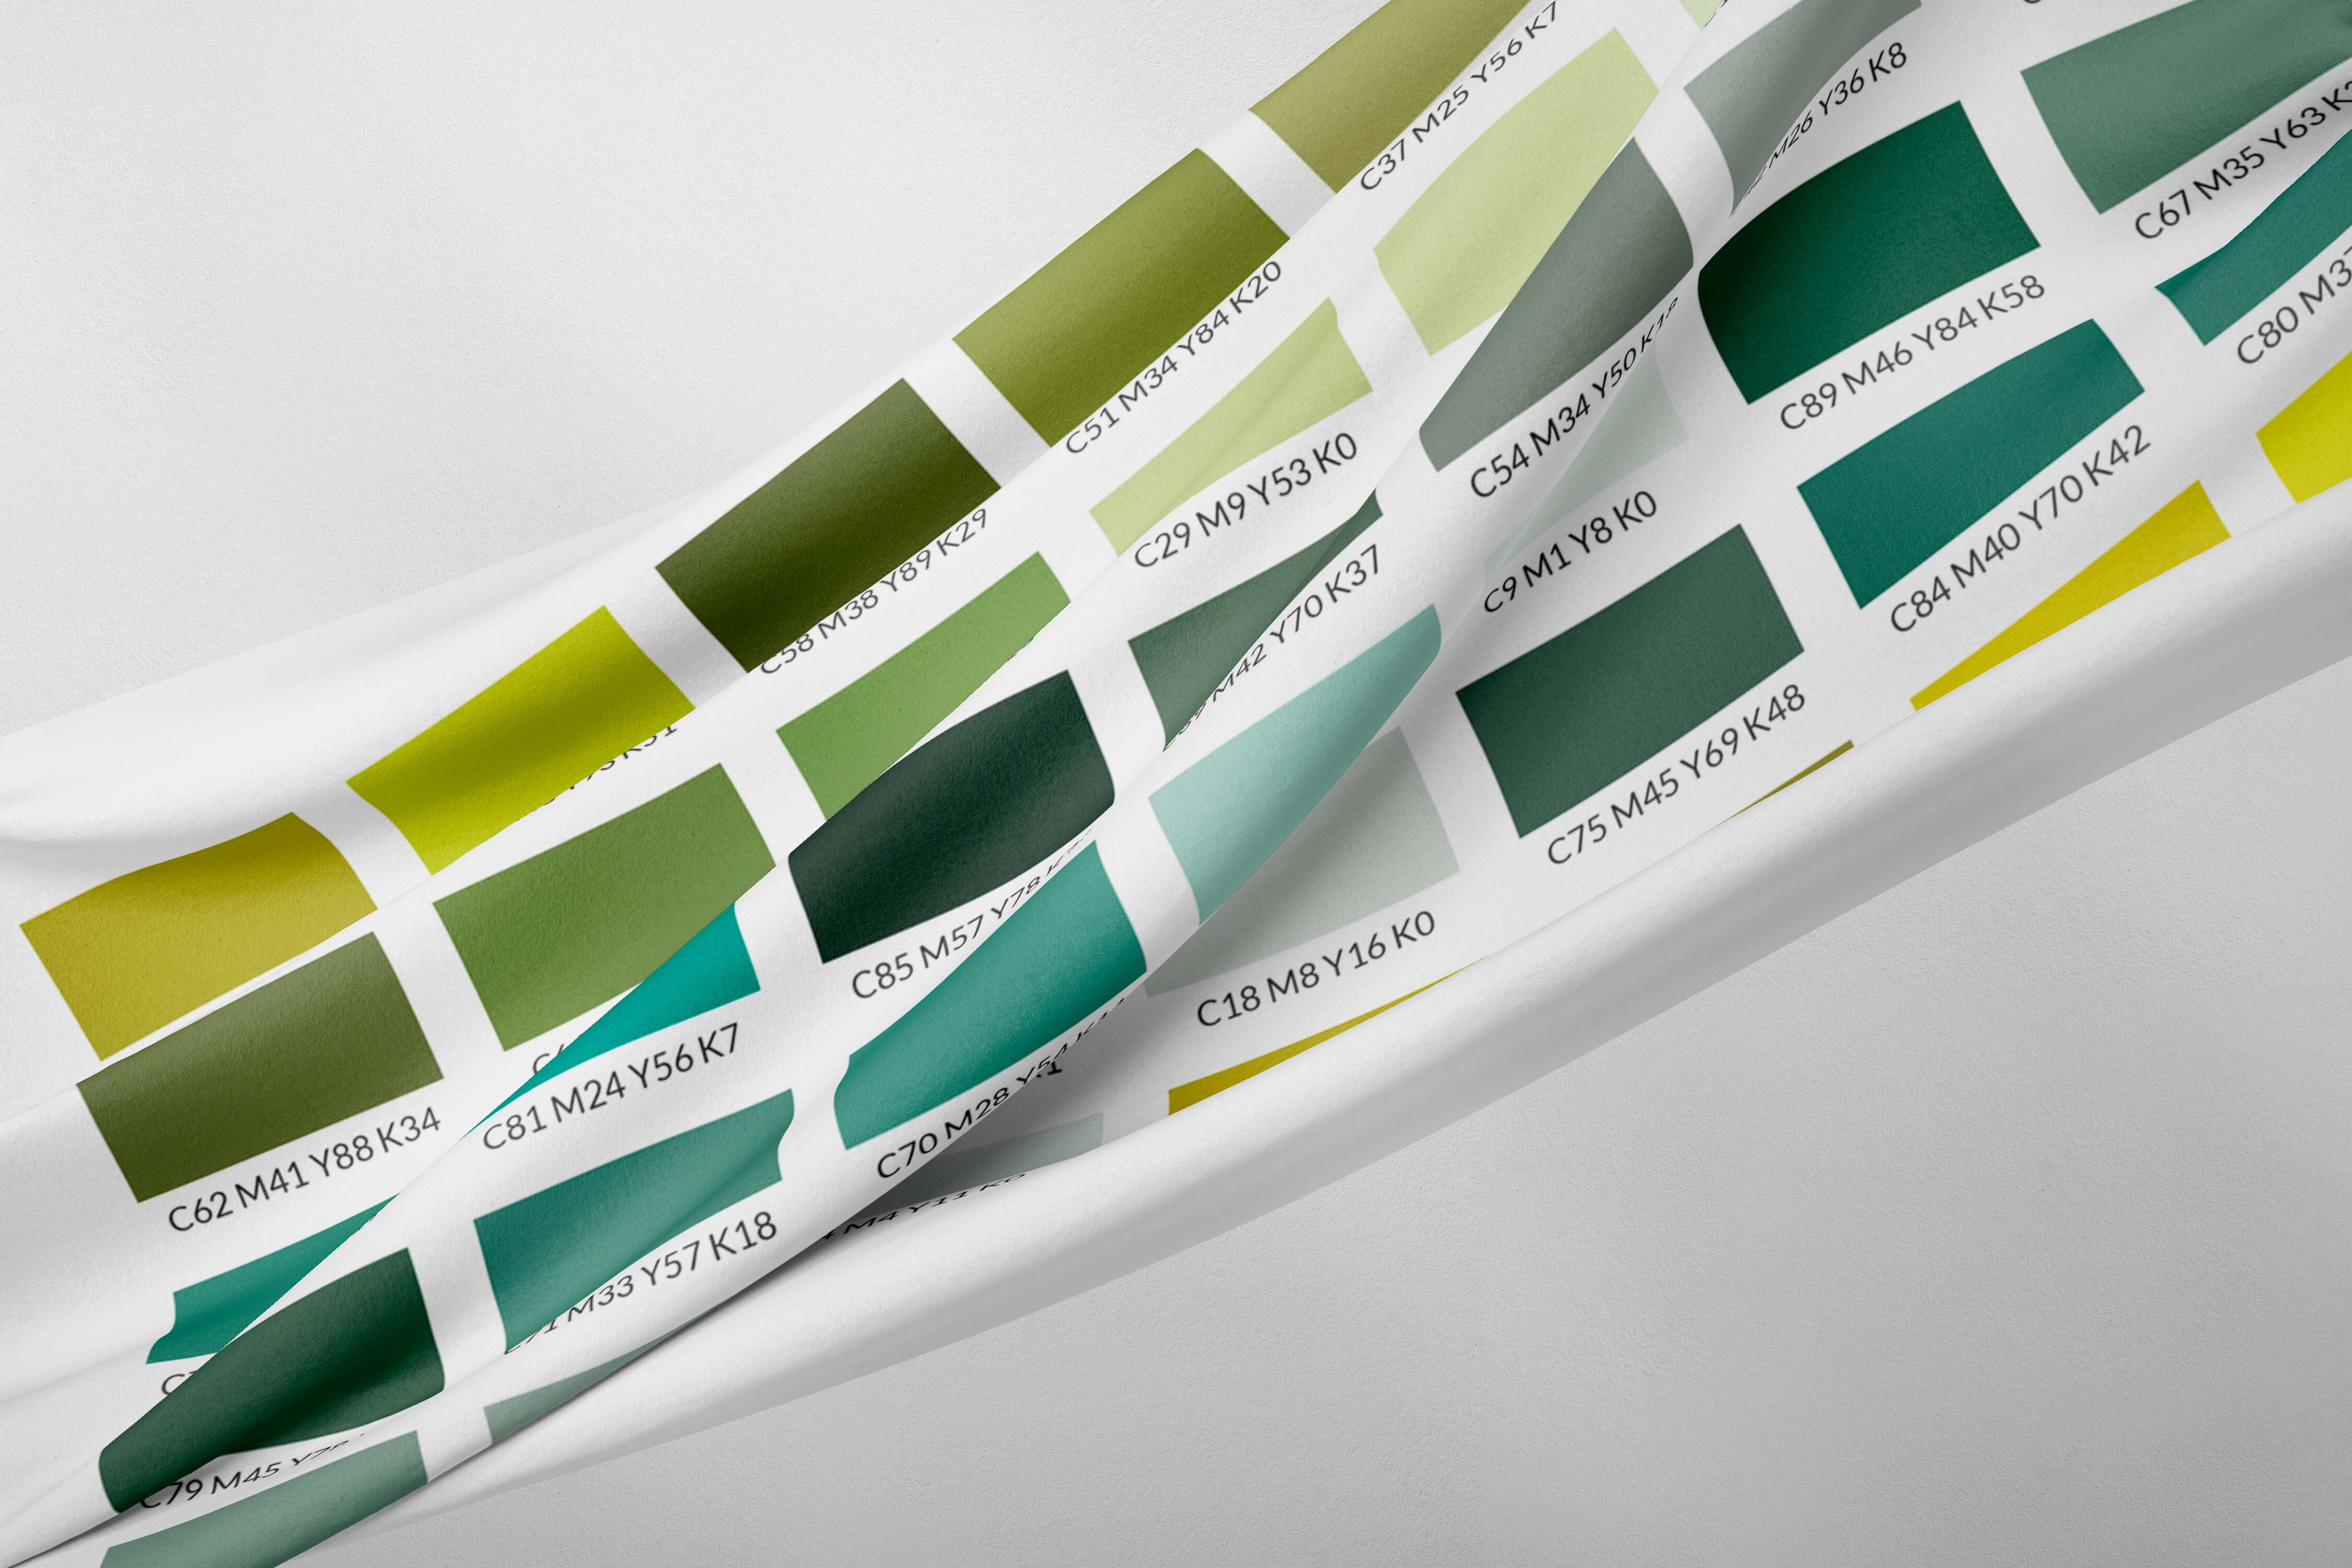
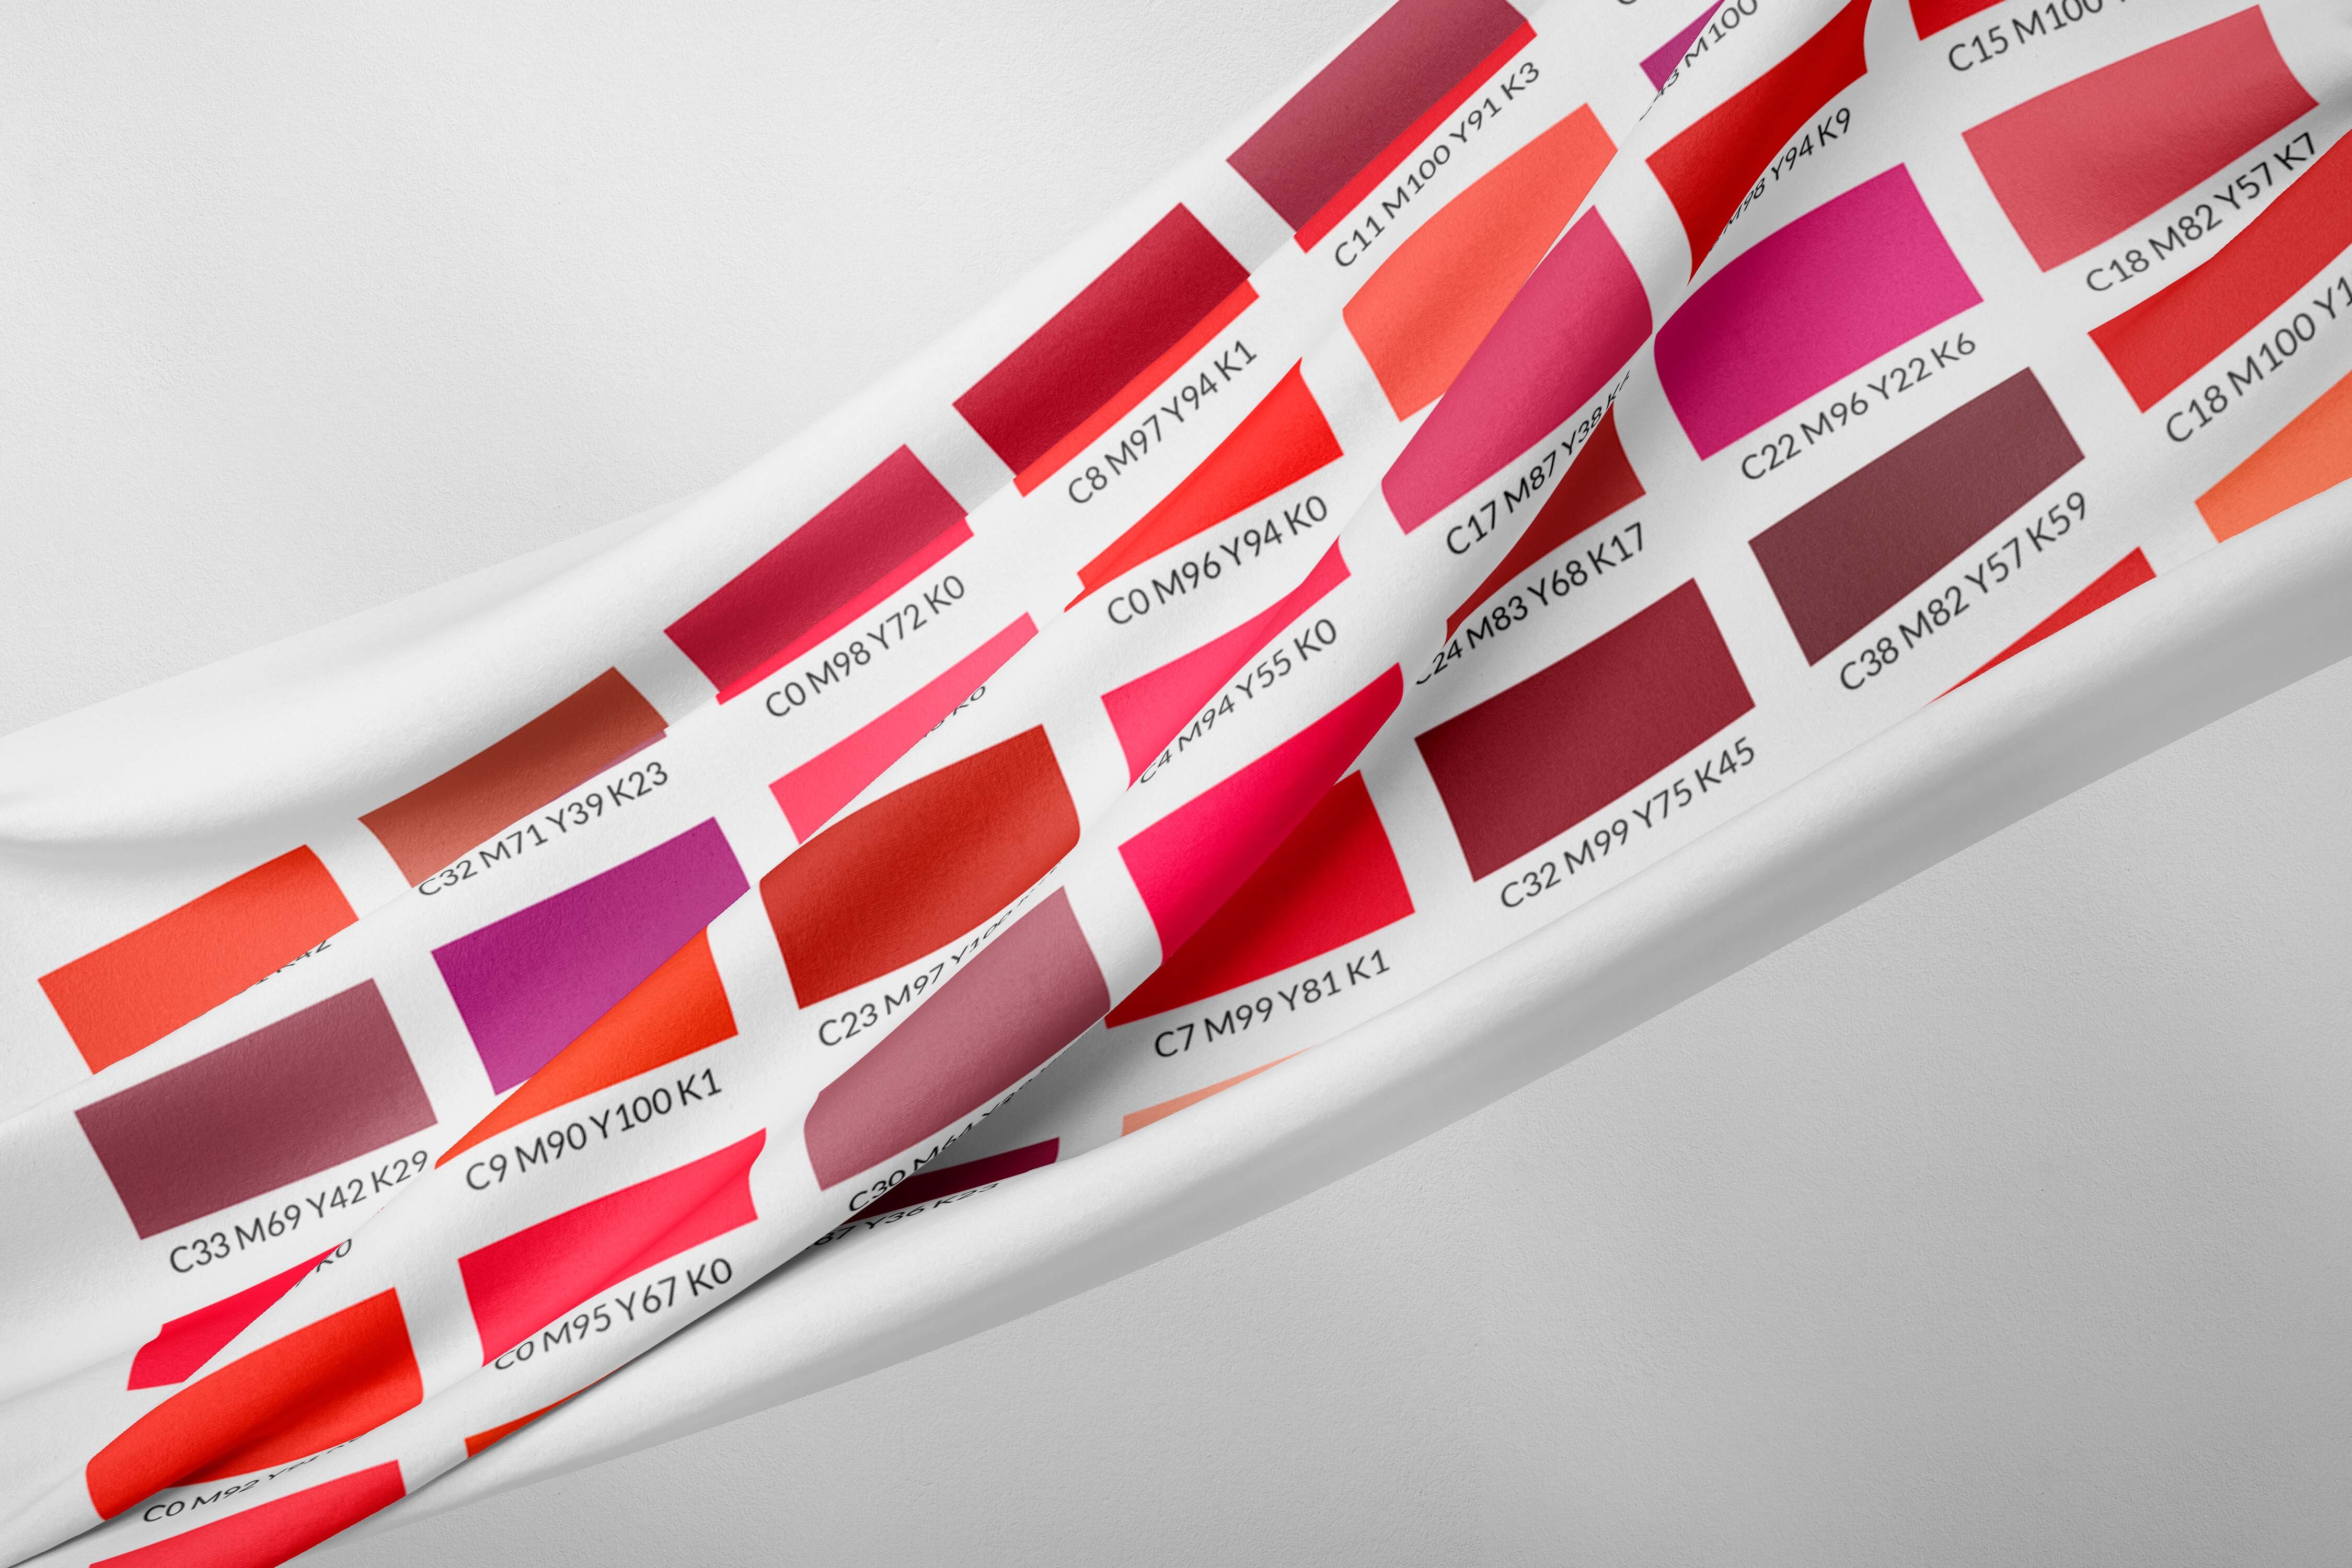
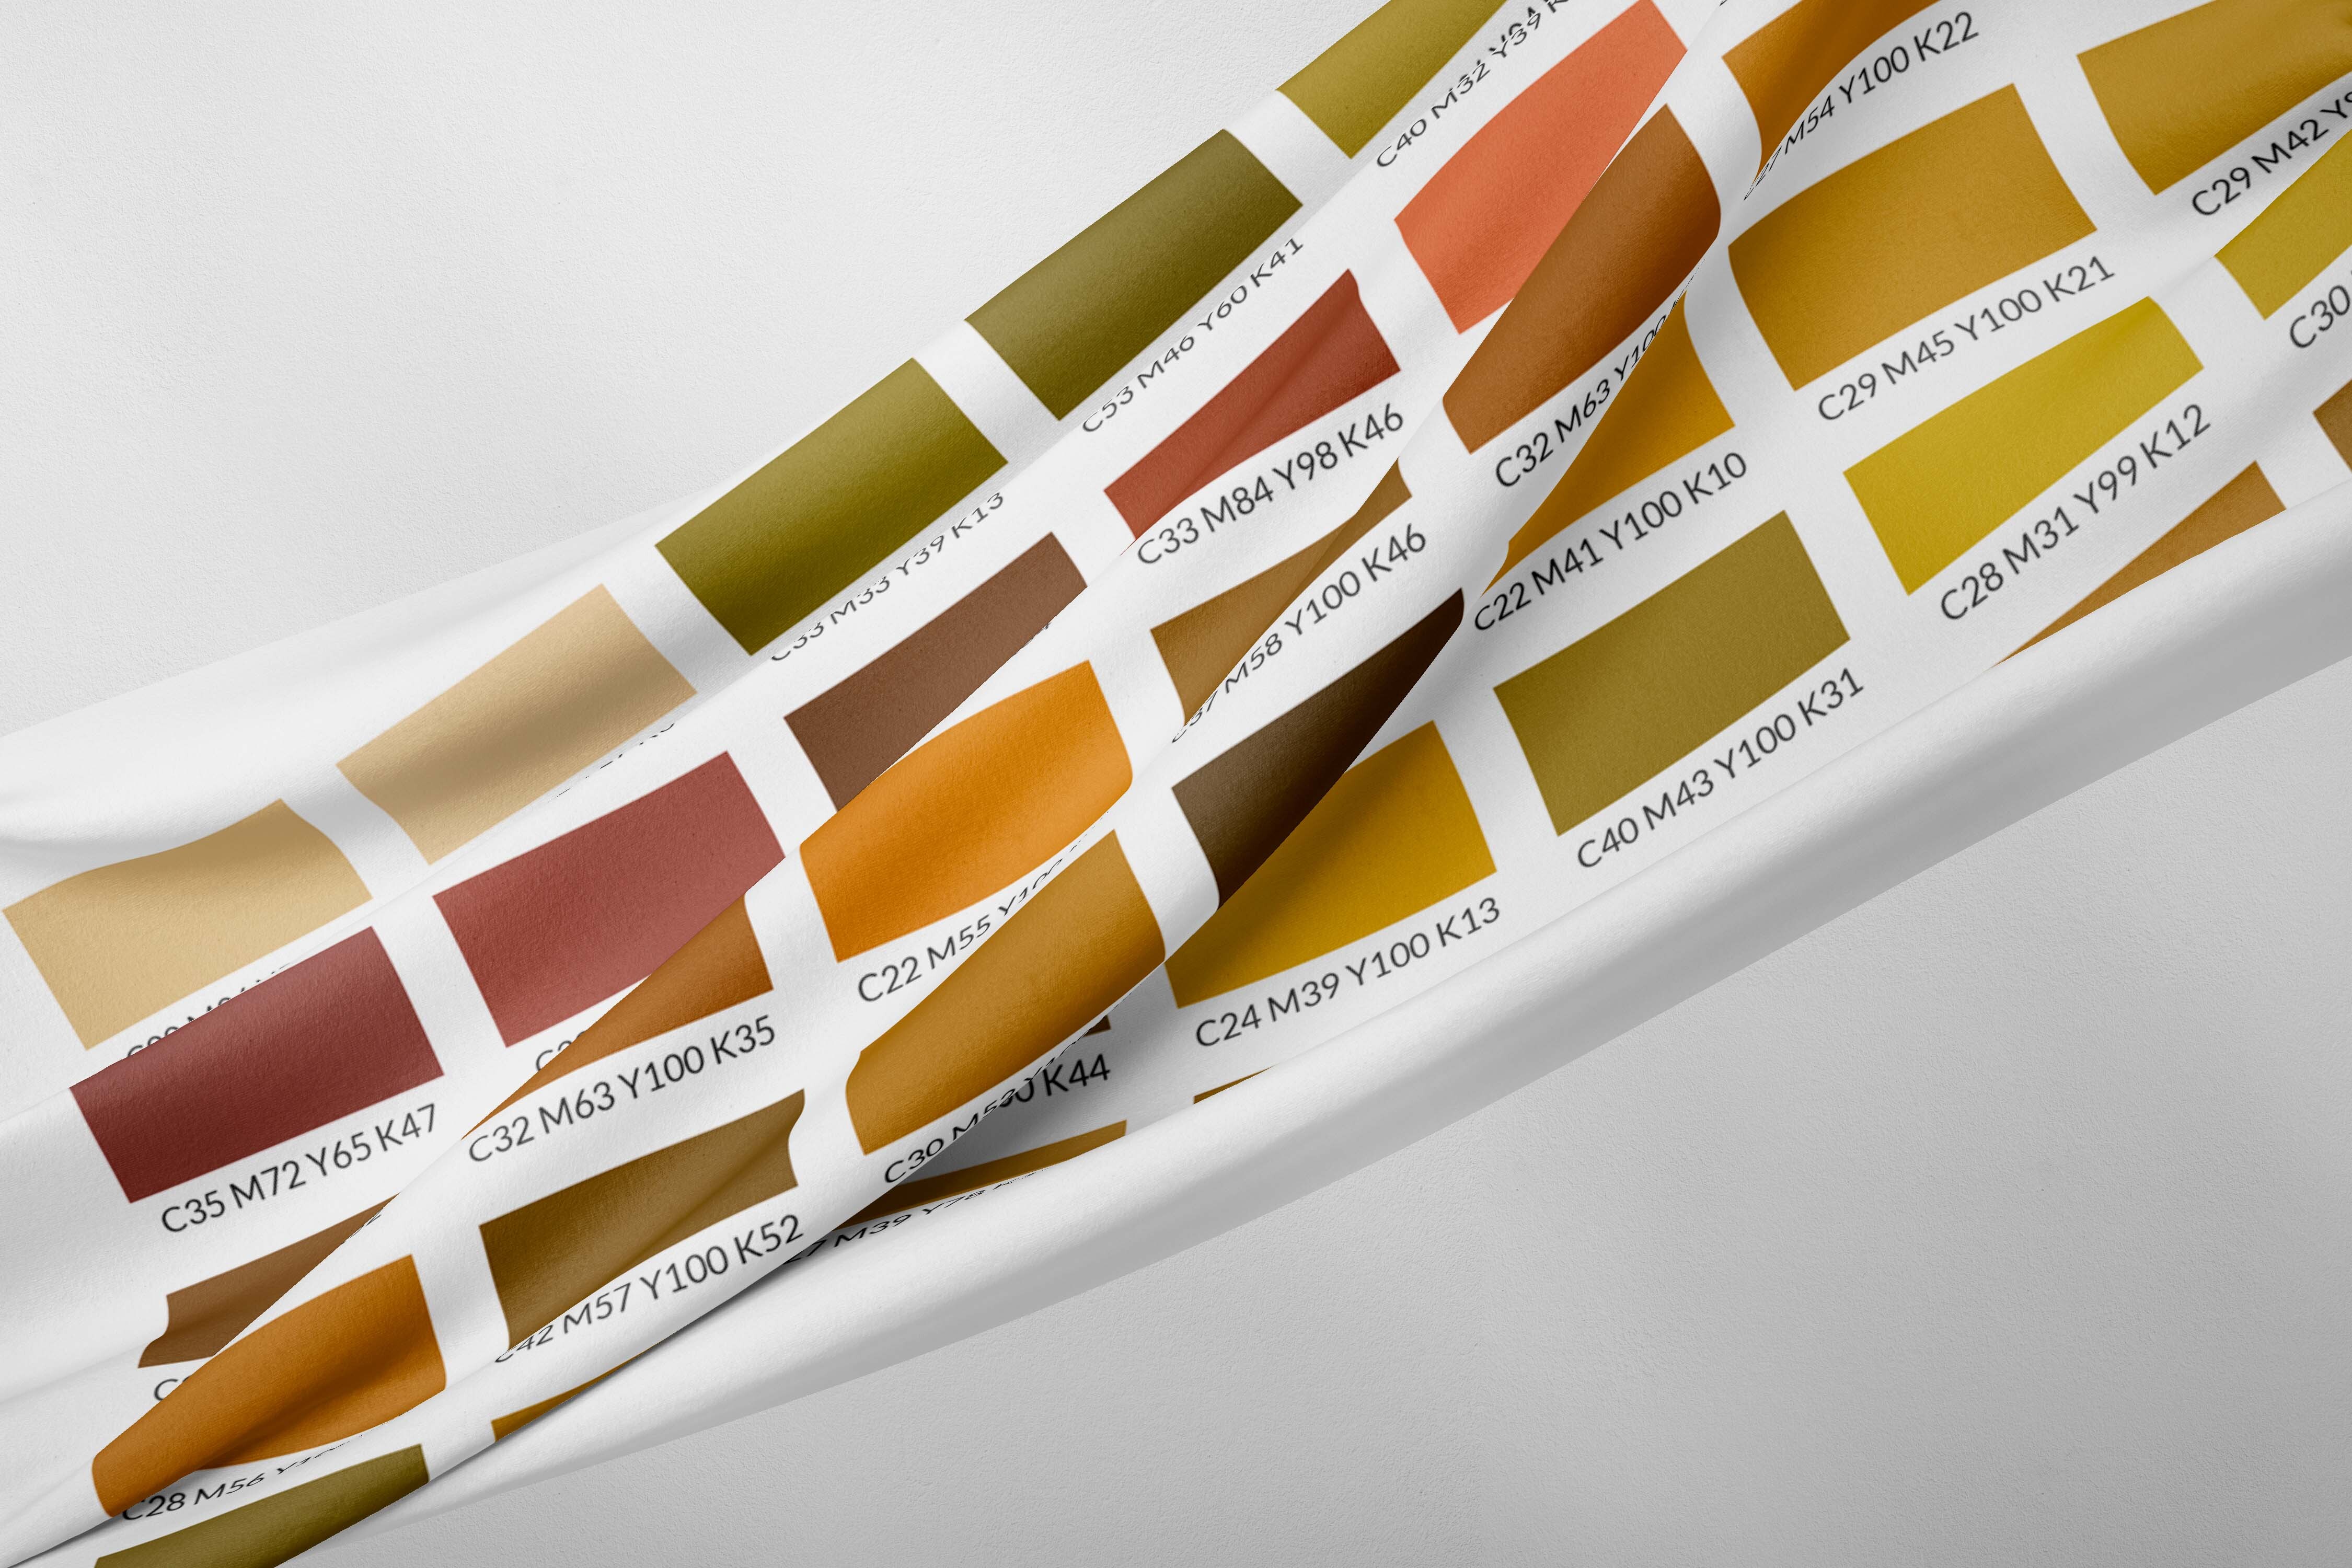
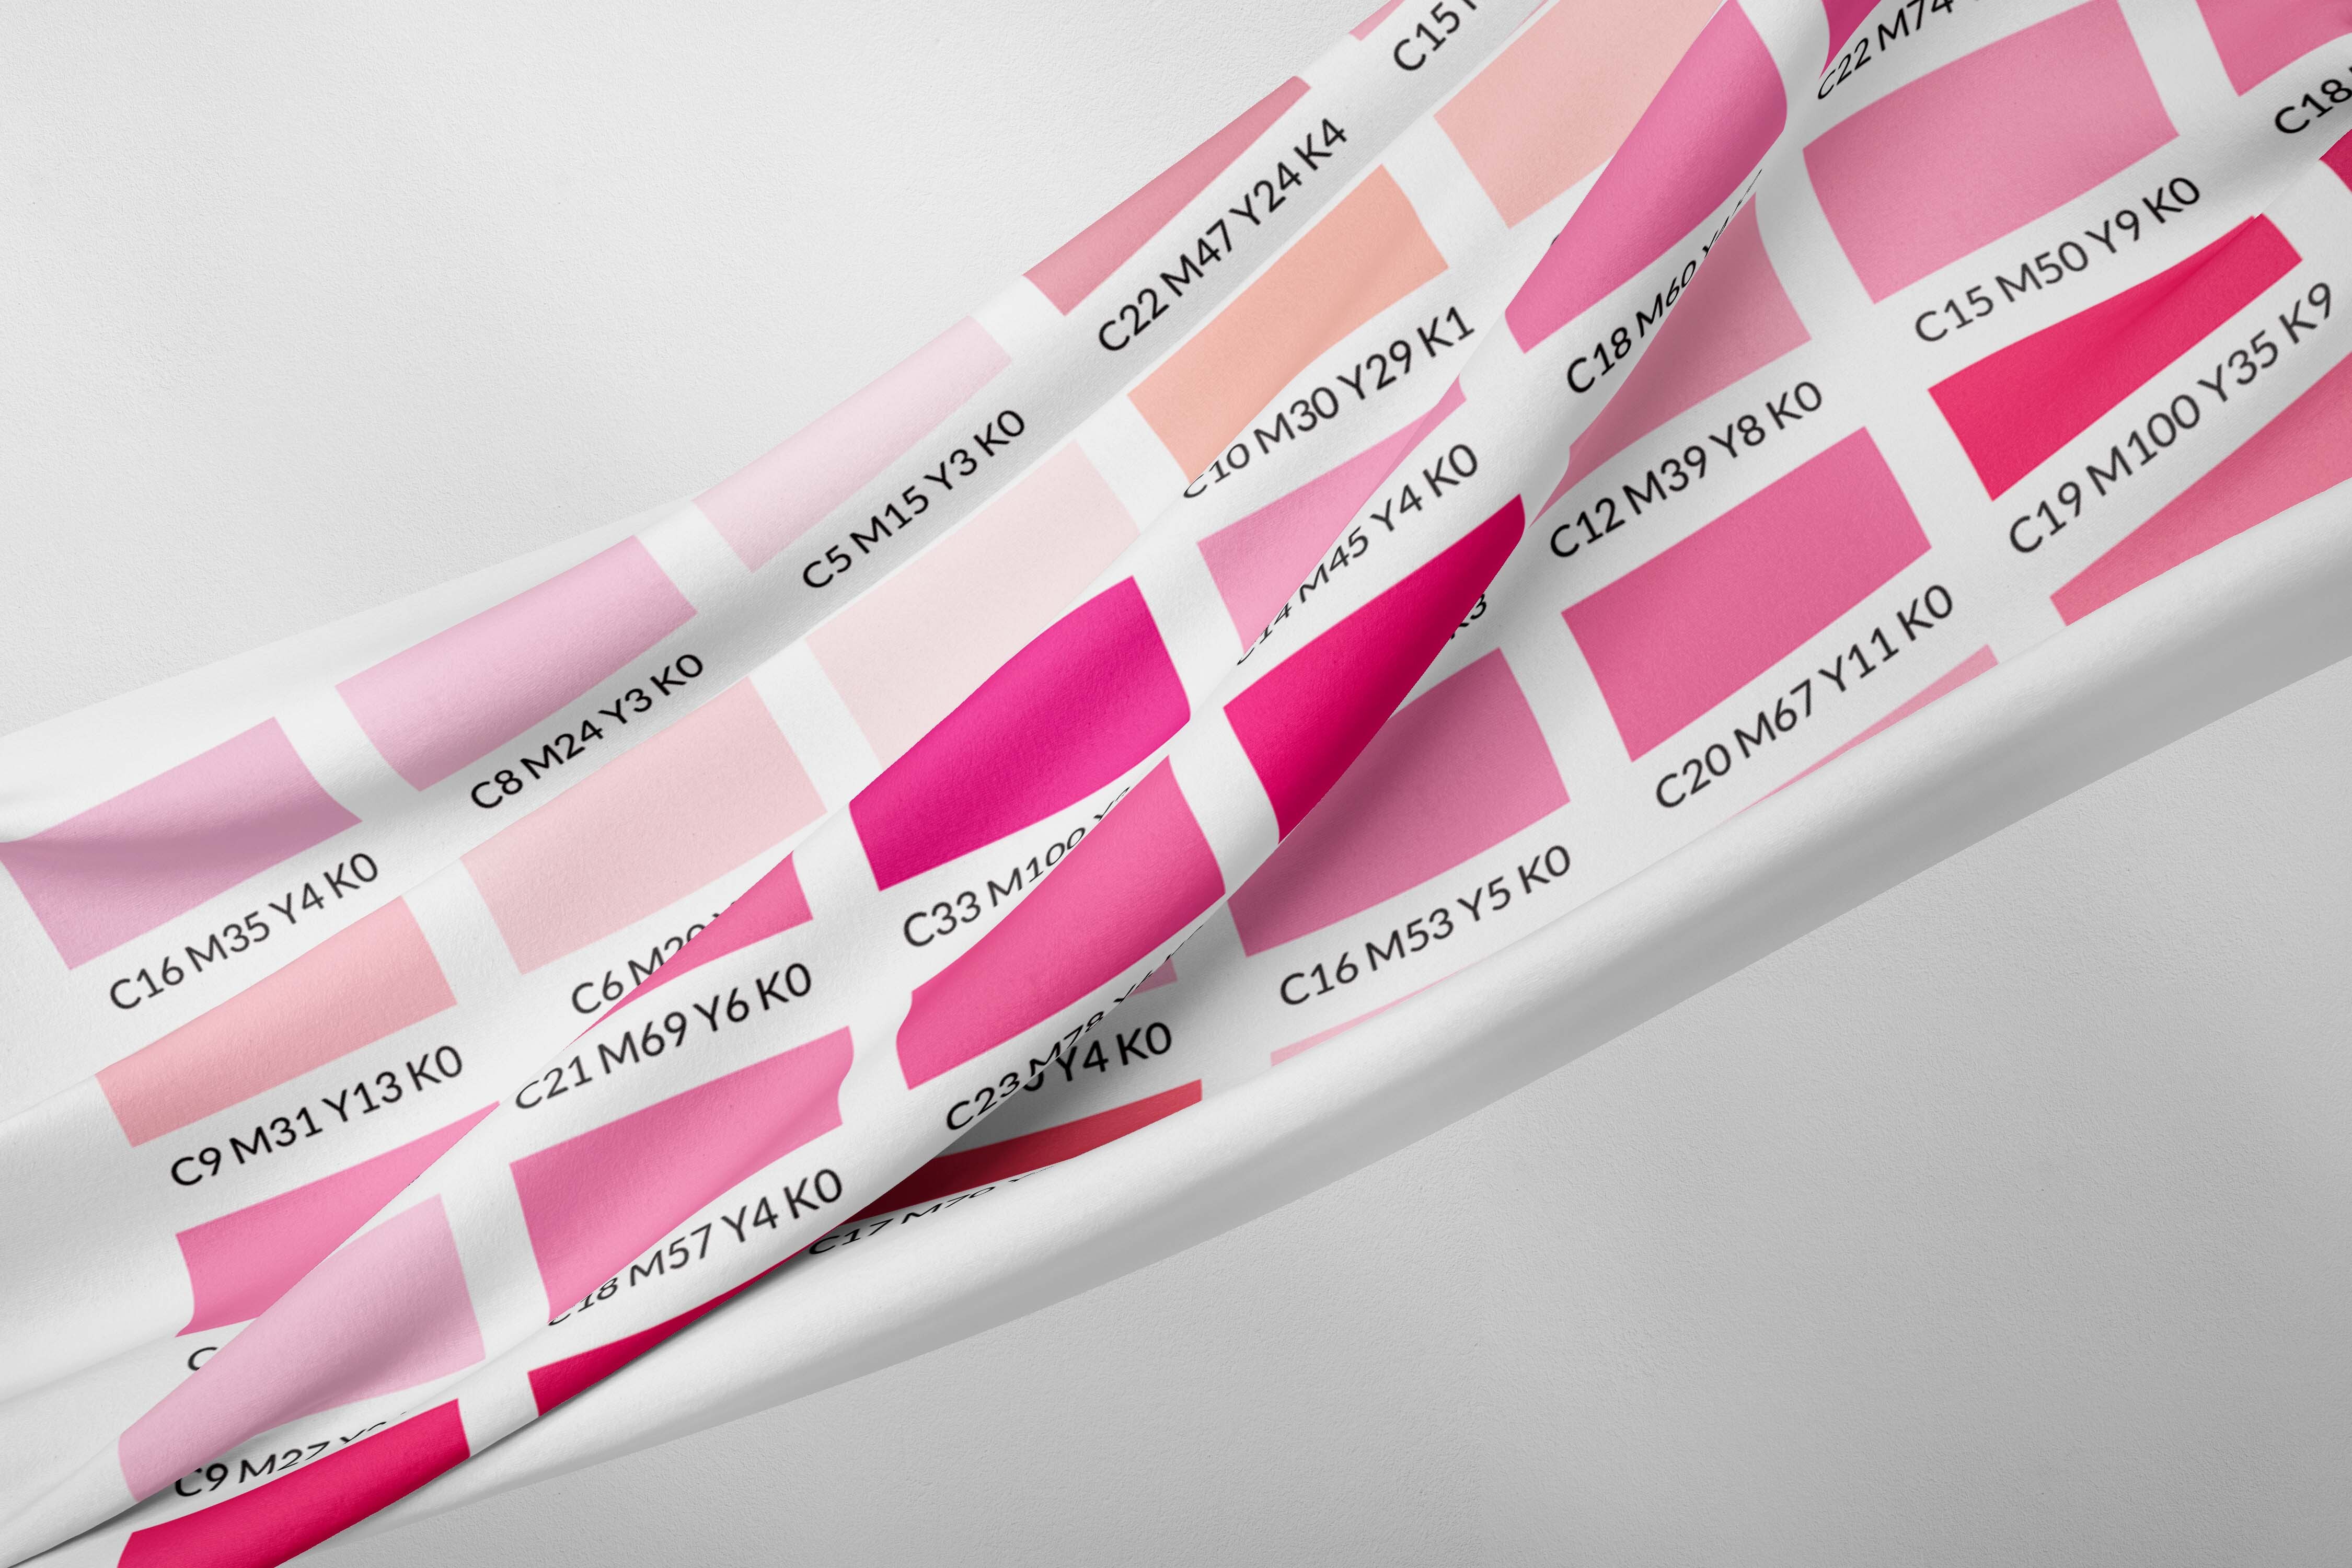
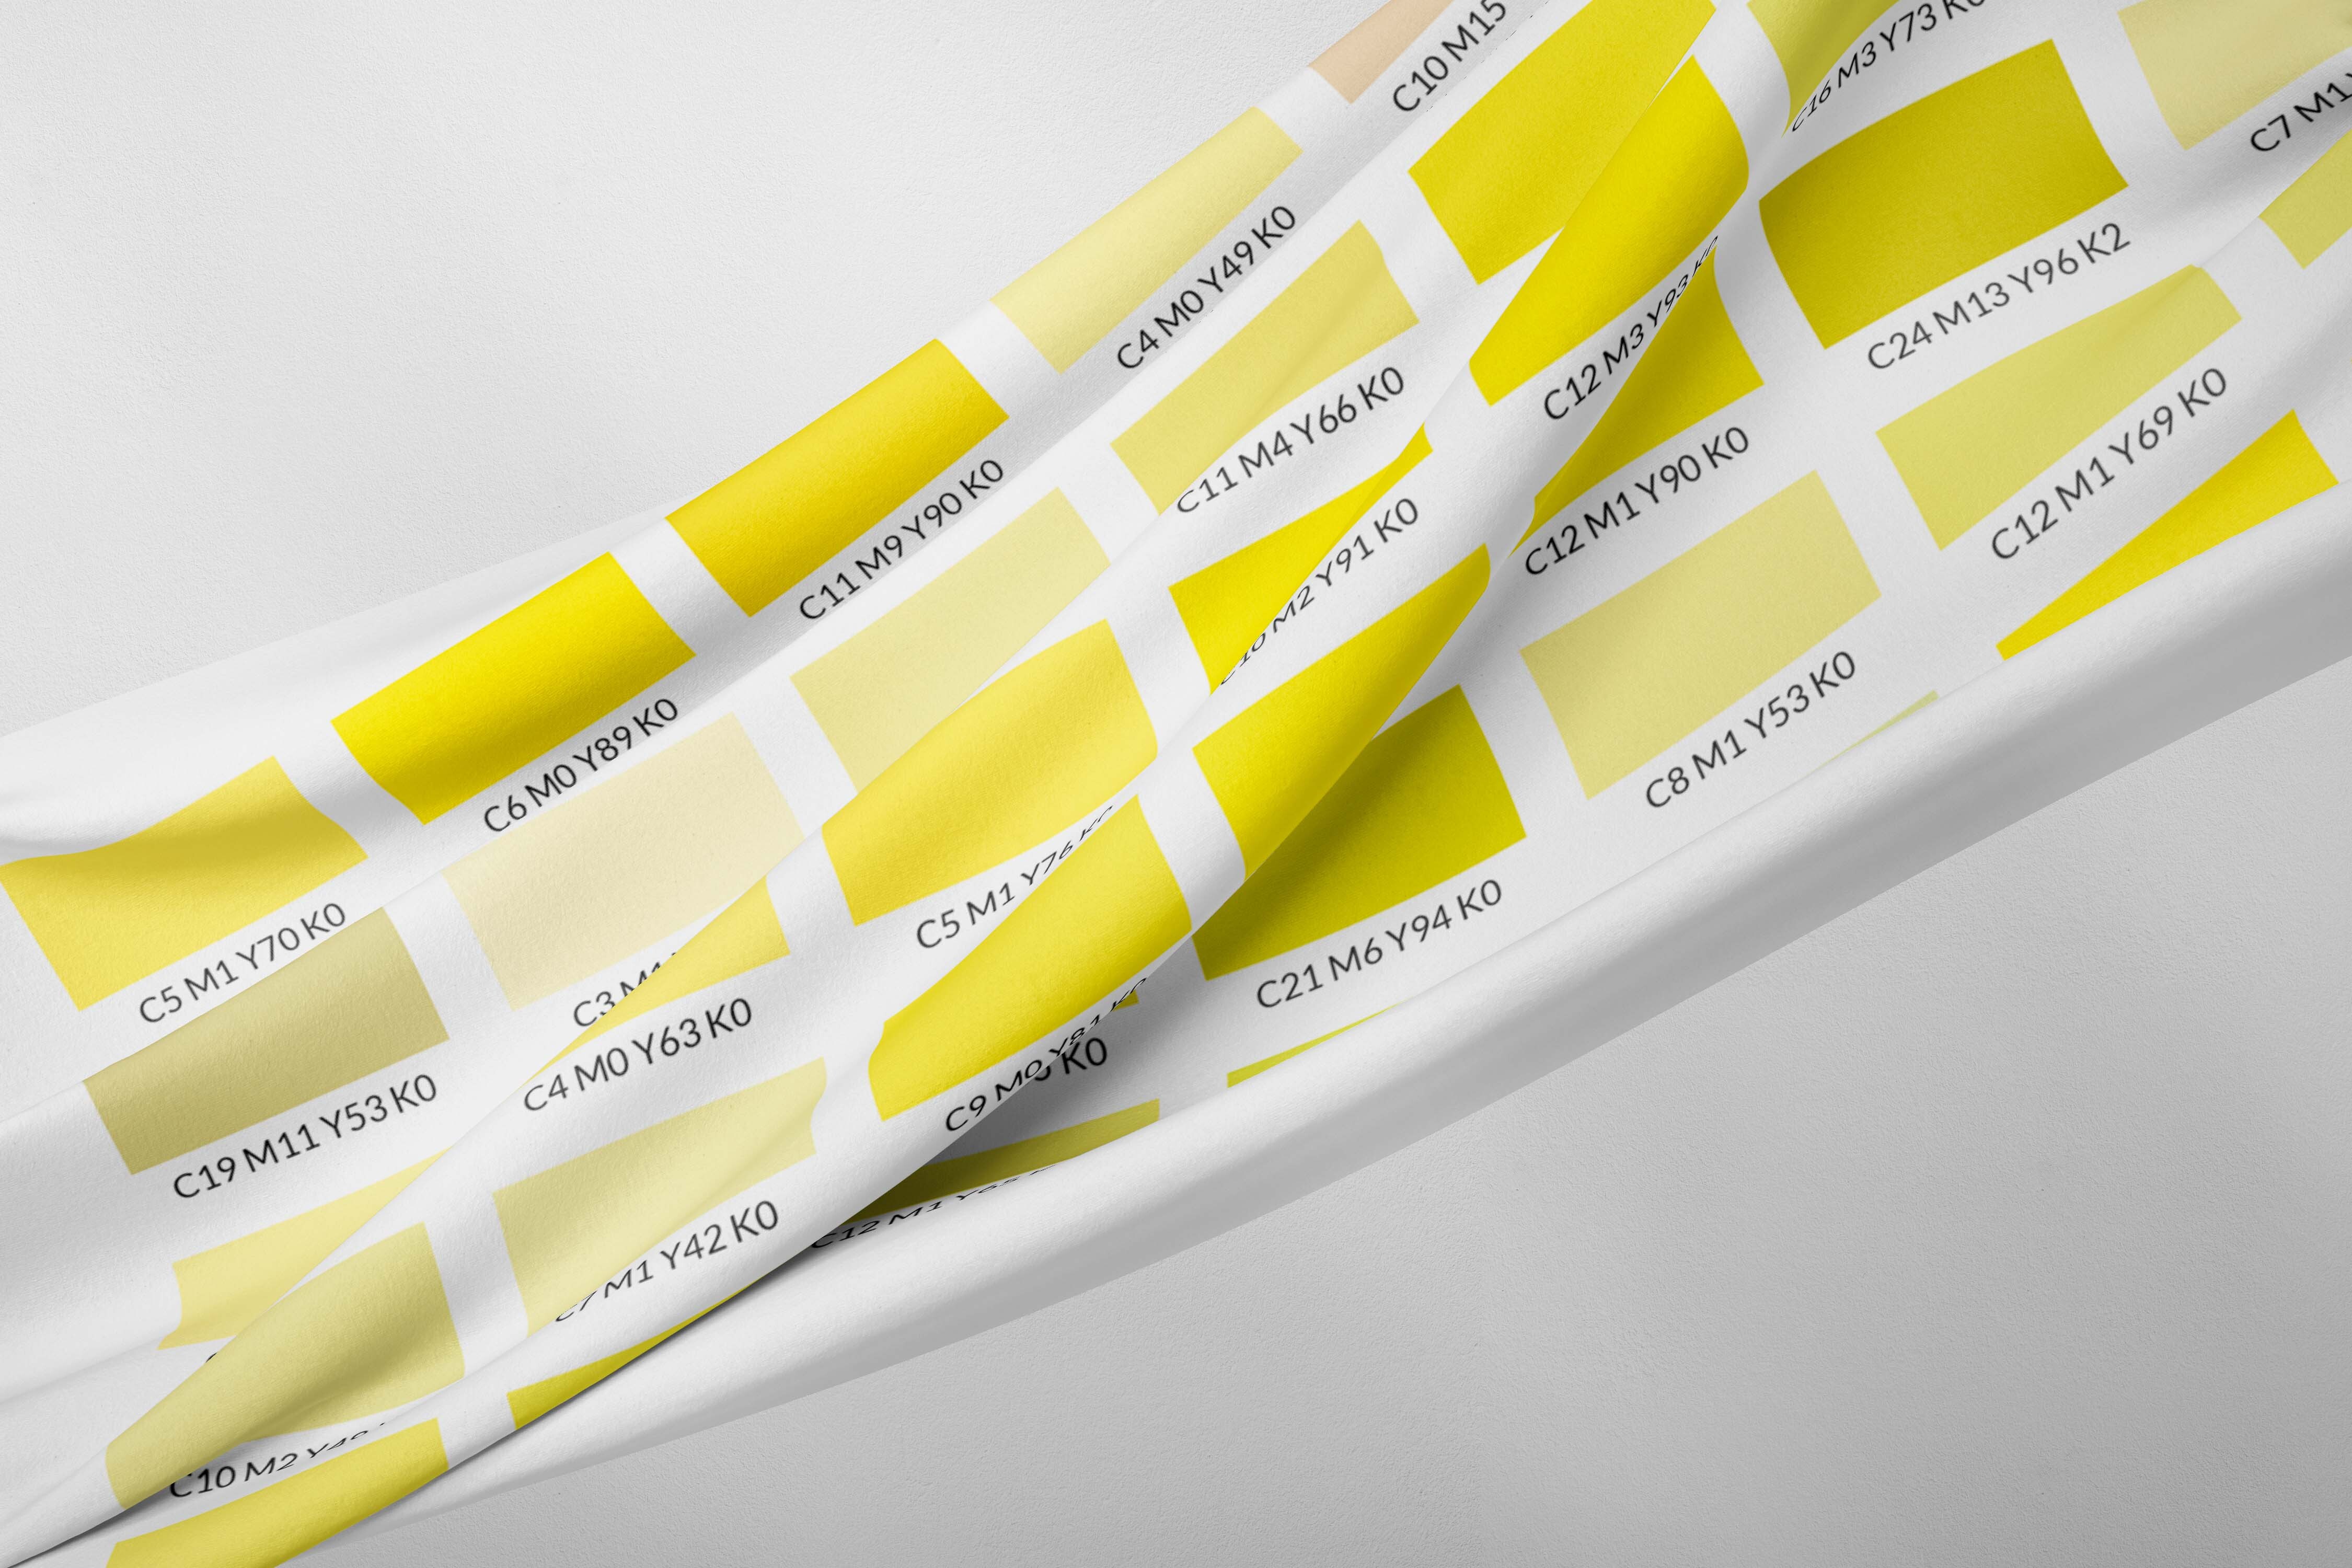
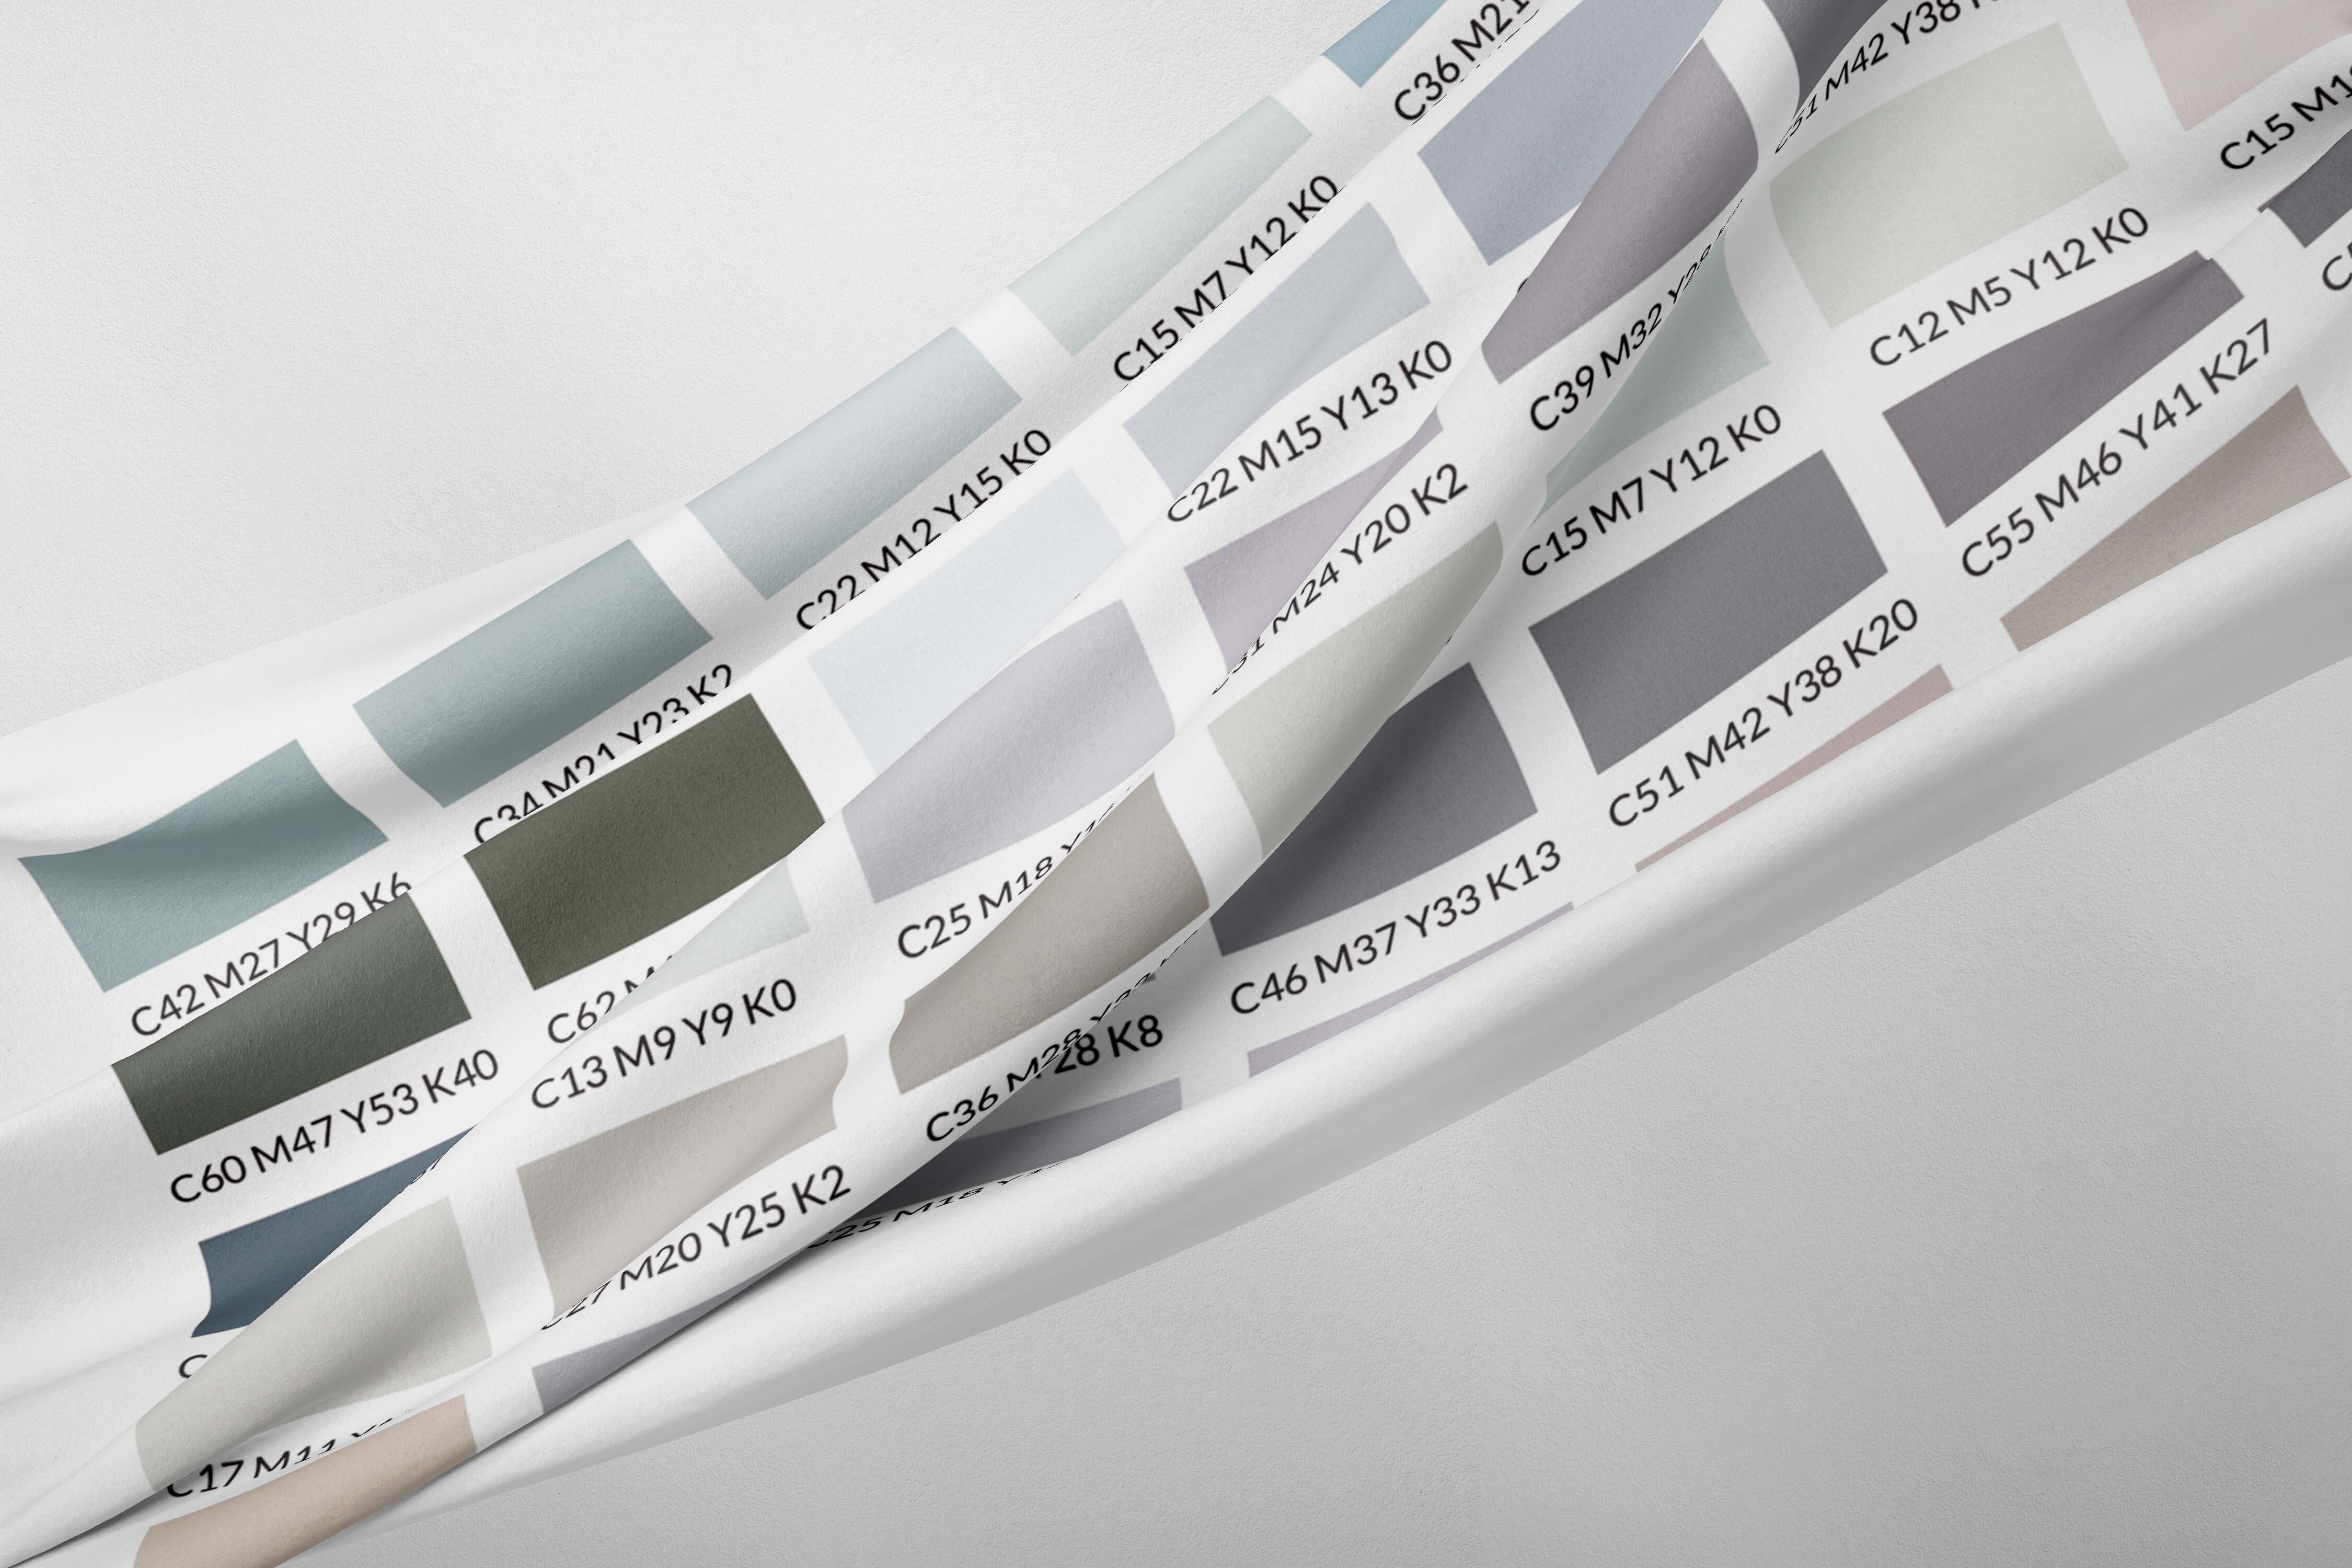
Color charts are an indispensable tool for many brands and design studios. If you already have yours, we can start.
First of all...what do you want to do?
To best meet your needs, we provide two options with detailed steps. Select the one that suits you best!
Print in solid colors
1. Choose a color from your Color Chart
It seems simple, but these are the kinds of things that lead to silly mistakes. Pay close attention to your color numbers, the numbers you need to consider are those below, not above.

2. Select "Quick Actions" from the menu and then "Search: By CMYK color"
In the main menu on the top right, you will find a "Quick Actions" dropdown button. Click on it and then, under searches, select "By CMYK color".
3. Locate the chosen color
Enter the CMYK values of the color you have chosen from the chart and click "Search". Once selected, you just need to choose the fabric you want and the number of meters.
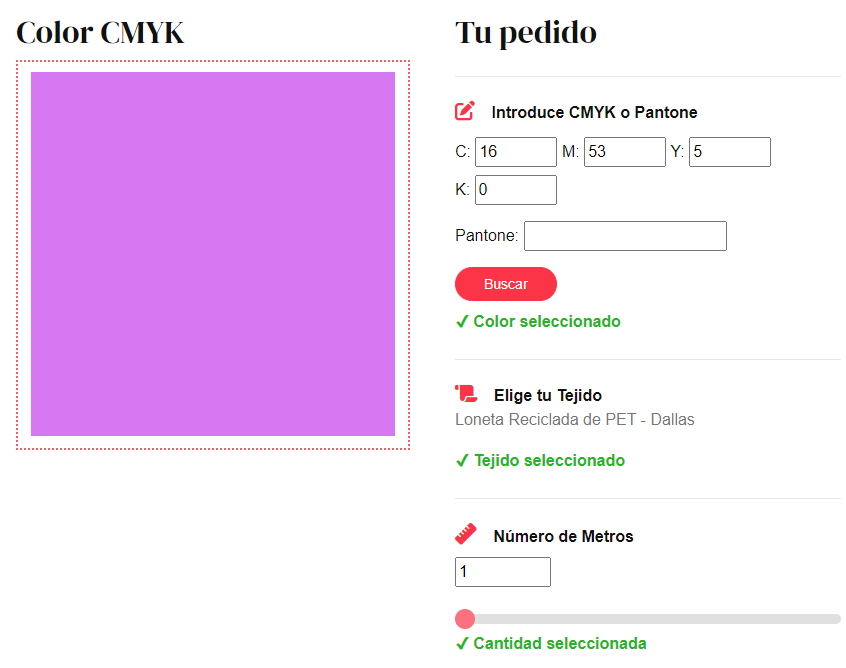
4. Fabric selection
If you don't know which fabric to choose or have doubts, it's advisable to get samples, you can find all kinds: synthetic, sustainable, recycled, etc. You can even create a small custom catalog, the first 5 samples are free!
You can also order small color charts of 20 cm x 150 cm, organized by color types such as: green color chart, red color chart, neutral color chart (white, black, gray), etc.
Create a print
1. Choose the colors you are going to use from your Color Chart
As we indicated for solid colors, care must be taken when selecting the CMYK values of our color; we must note the numbers below, not those above. You now have the most relevant information to create the colors for your print; jot down the CMYK values of the colors you like so you can transfer them to your image editing program.
2. Choose the program you will use to create your print
We briefly discussed color profiles earlier. This is where they will truly come into play, as just like a color looks different on each screen, the same happens with these types of programs. Therefore, we must make some changes before creating our print. We give you two options that we will explain in depth below, so that we don't leave anything out. Select and go for it!
Illustrator
1. Create a new document
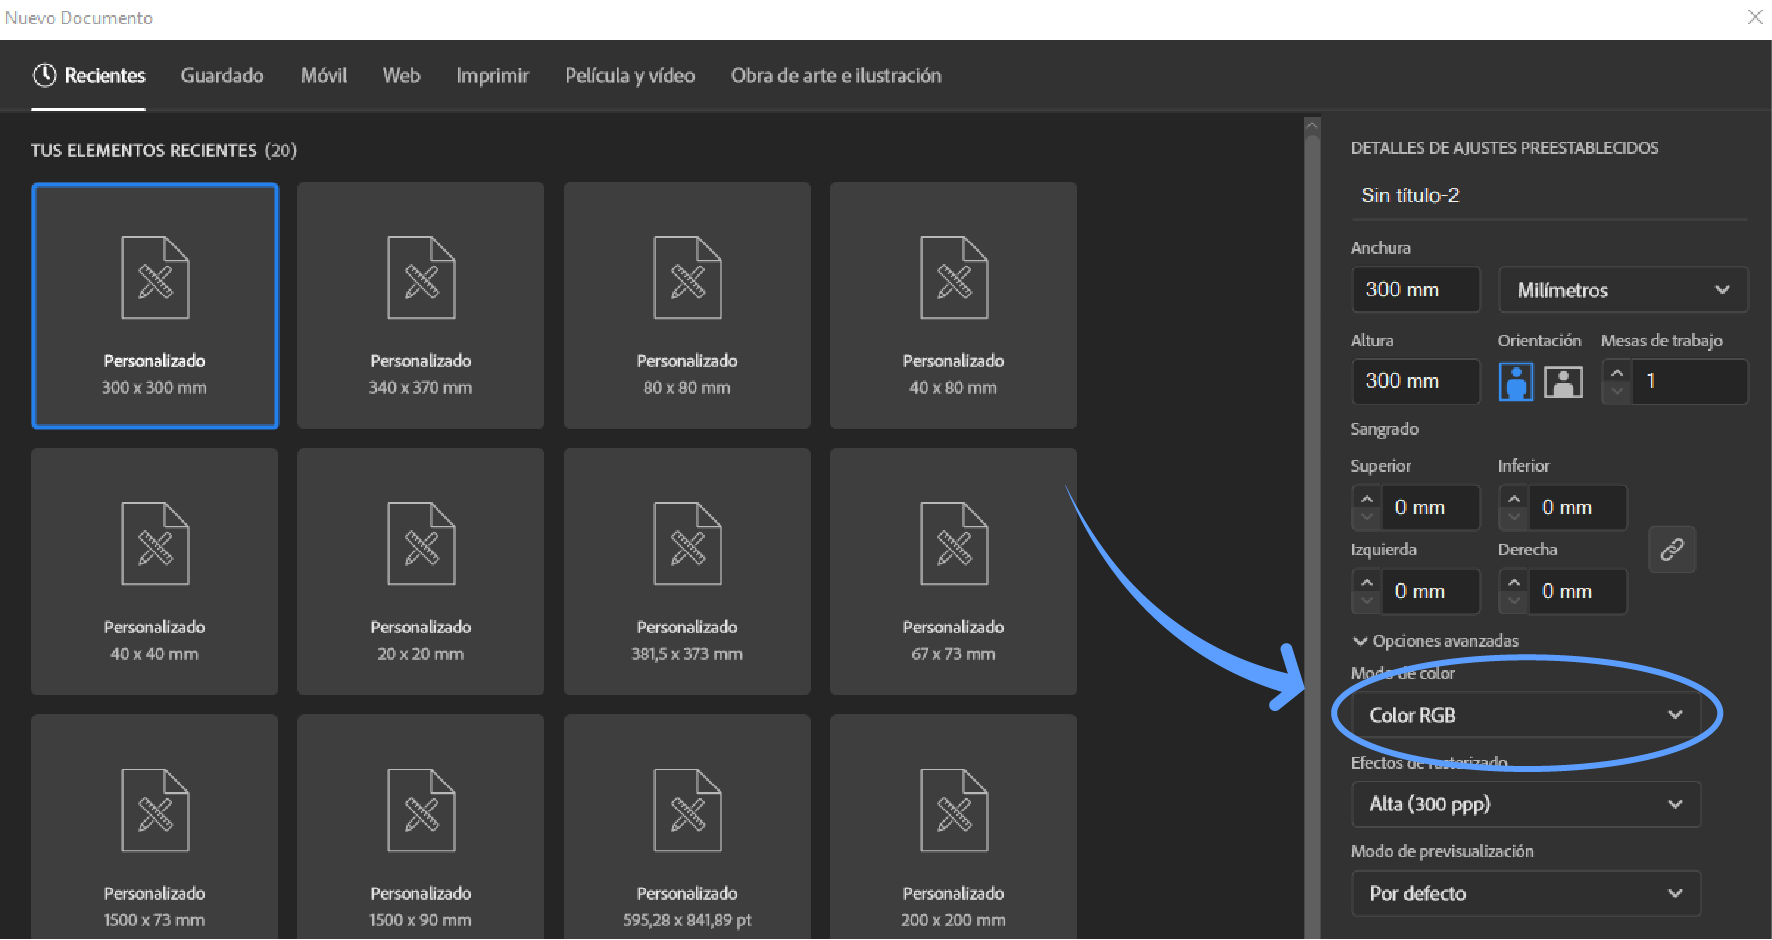
Illustrator makes things simple and you can make profile changes directly in the "New Document" box. To get there, you just need to go to the top menu and select "File", "New..." and you'll have it. Once there, in advanced options, you'll need to change the color mode to CMYK if it's not already selected by default. Save everything and move on to the next step!
2. Assign the correct color profile
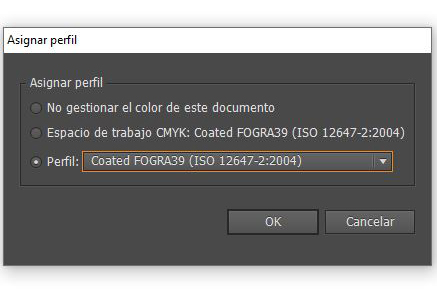
To ensure that your color profile is identical to ours, we will need to go to the top menu again. There, we will click on "Edit" and "Assign Profile". The following box will appear, where you can choose ours in the third option: Coated FOGRA 39.
3. Insert the chosen colors
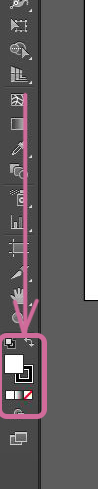
To select our colors, we must go to the vertical tools menu and double-click on the color square (usually white). In the box that appears, you will see the CMYK of the current color. This is where you should enter the color codes. As you enter the digits, you will see the initial color change. Once all this is done, you can start creating!
4. Save your design

To save, you must also ensure that the previously selected profile is maintained. Illustrator will not give you problems in that regard, but to save as JPG (it is the most recommended when printing) you will have to go to the top menu and click on "File", "Export". This will allow you to save it as JPG. Otherwise, that option will not appear in "Save as". With this, you'll be done!
Photoshop
1. Assign the correct color profile
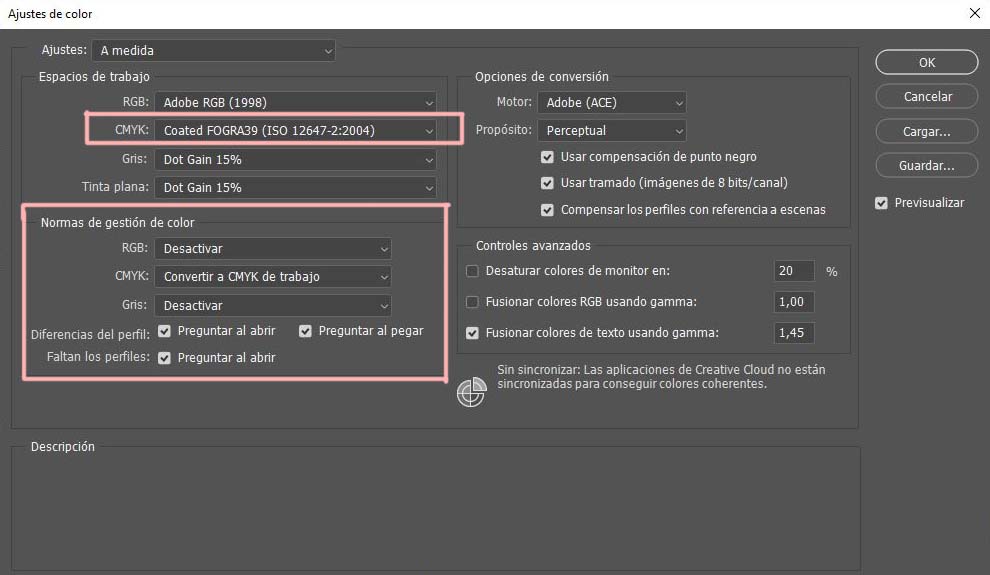
Photoshop follows a similar process to Illustrator, but in this case, we will not open or create any file yet. First, with the program open, we will go to "Edit", "Color Settings". Then, we will change the CMYK of the workspace to COATED FOGRA39. This will be the profile we use for printing, so it is very important that you work with it. Then, in "Color Management Policies", we will disable RGB and in CMYK we will change the preset option to "Convert to Working CMYK". Once this is done, you can save the profile changes and create your print.
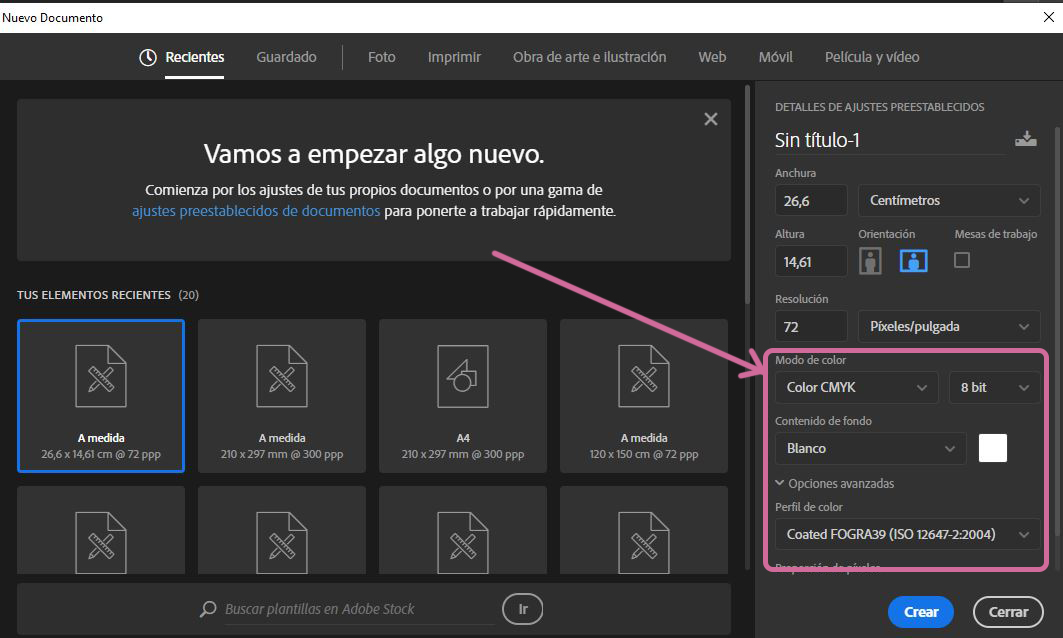
2. Create a document for your design
To create a new file in Photoshop, just go to the top menu and select "File", "New". A window will appear where you can re-alter the color profile, as well as give your design the dimensions you deem appropriate. Despite having changed Photoshop's default profile, it is possible that RGB still appears instead of CMYK, so it will be necessary to check this before creating the document. Similarly, under "Advanced Options" the Coated FOGRA 39 profile must be selected.
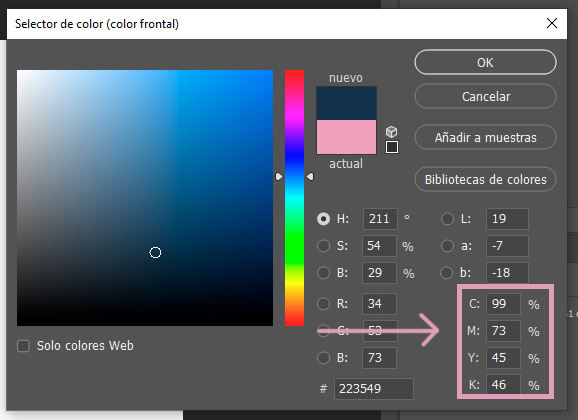
3. Insert the chosen colors
To select our colors, we must go to the vertical tools menu and double-click on the color square (usually white). In the box that appears, you will see the CMYK of the current color. This is where you should enter the color codes. As you enter the digits, you will see the initial color change. Once all this is done, you can start creating!
![]()
![]()
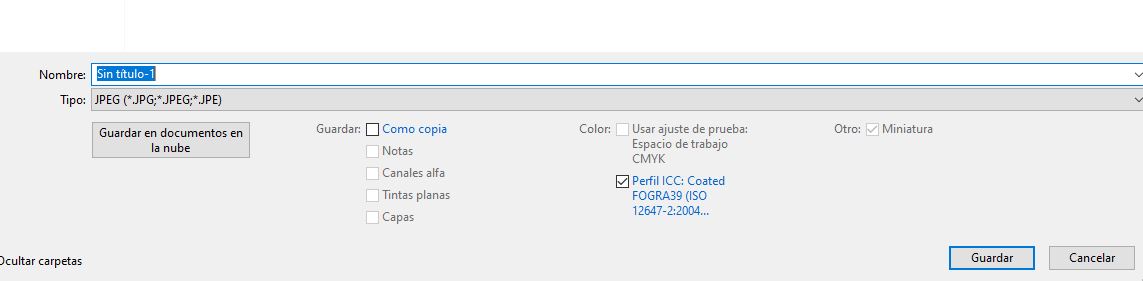
4. Save the design
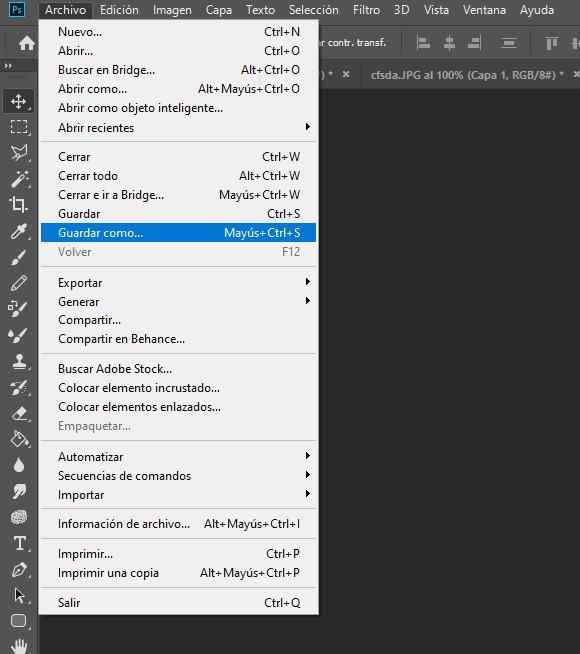
To save it correctly, you must go to the top menu and click on "File", "Save as". A window will appear where you will decide where and how to save the file. It is very important that you choose the JPG option, as it is the most advisable when printing. You also have to check that the profile is the one you have selected: Coated FOGRA 39. With this, you will have finished!
In summary, color charts provide a common language for communicating about colors among designers, printers, and clients. Their use ensures that colors are accurate and consistent across different production batches, and they guarantee results for clients against any possible issues or deviations.
We hope this small tutorial has been useful. Don't hesitate to contact us at info@waixo.com if you have any questions! We remind you that you can purchase the complete color chart here, or work with your own color chart if you prefer.